In this guide, I am going to share with you my experience with Roku audio being out of sync or being delayed, how I was able to fix it and other methods that have worked for other people who had the same issue.
I recently experienced an issue with Roku sound in which case, the audio suddenly was out of sync and delayed on all channels. This included but was not limited to Apple TV+, Peacock, Netflix, YouTube, HBO Max, YouTube TV, Sling, Crunchyroll, Plex, Hulu, Amazon, CBS News, PBS and Disney+. My streaming experience suddenly went bad.
The audio started to lag when I paused streaming and resumed back. For others, it happened when they switched channels, or sometimes, out of nowhere! In other cases, it’s the video that lags behind the audio (audio faster than video). Either way, your Roku audio gets out of sync with the video.
After trying a number of things that I thought might work in fixing the audio sync issue on Roku and spending hours online doing research on what works, I finally found various proven ways to fix the issue permanently which I will share with you in this guide.
This fix applies to all Roku models including Roku streaming stick, Roku Premiere+, Roku express, Roku Ultra, and all RokuOS TV brands like Hisense Roku TV, TCL Roku TV, Onn. Roku TV, Westinghouse Roku TV, Element Roku TV, RCA Roku TV and others.
There’s no time to waste, let’s begin right away!
Roku Audio Out of Sync – How to Fix
If your Roku audio is out of sync, go to the Home tab. Now, from your Roku TV remote, press the ‘Home’ button 5 times, ‘Up arrow’ button once, ‘Rewind’ button twice and the ‘Fast forward’ button twice in order. Your TV will reboot and the issue will be fixed.
1. Clear Roku TV Cache
Most people who experienced the issue where Roku audio was out of sync or delayed were able to fix it by clearing their Roku TV cache.
Doing this is quite simple, all you need is your Roku TV remote (if you are using a universal remote, this won’t work). This is because clearing your Roku TV cache is done by pressing a combination of keys on your Roku remote controller.
You have to press the keys in succession as seen below for the process to work.
NOTE: Clearing your cache is not the same as resetting your TV in that all your settings and installed channels will still be intact. In other words, you have absolutely nothing to lose at all.
If your Roku audio is out of sync, the following combinations on your Roku remote will fix the issue for you.
- First, go to the Home tab
- Now, press the ‘Home’ button on your TV remote 5 times
- Next, press the ‘Up arrow’ ⬆️ button on your remote once
- After that, press the ‘Rewind’ ⏪ button twice
- Then, press the ‘Fast forward’⏩ button twice
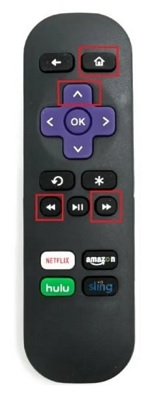
After a few seconds, your TV will shut down and boot up again and audio out of sync issue will be fixed. This whole process should take 1-2 minutes to be completed.
The video below will also show you a visual demonstration of the process.
2. Power Cycle Your Roku TV
A quick power cycle of your Roku TV has proven to fix the audio sync issue for a lot of users.
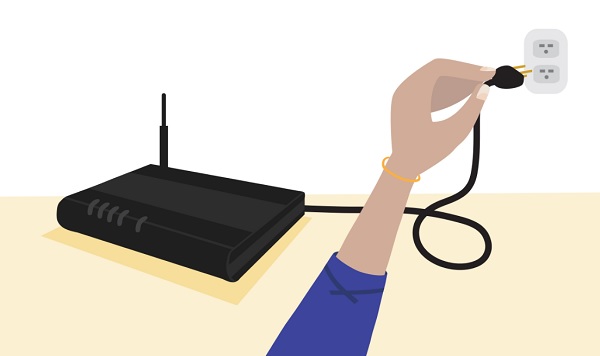
This is also called a soft reset (and just like clearing your cache, all your settings and installed channels/apps will be intact). Now, let me show you how to do this.
With your Roku device still plugged into your TV, do the following to power cycle your Roku TV:
- Unplug your TV from power outlet
- Leave it unplugged for 60 seconds
- Now, plug the TV back into the power source and allow it to turn on
Once your Roku TV powers back on, the audio or visual delay issue should be fixed.
This works for all Roku TV brands like Hisense Roku TV, TCL Roku TV, Onn. Roku TV, Westinghouse Roku TV, Element Roku TV, RCA Roku TV and others.
If the issue was fixed for you, great! Otherwise, let’s move on to other proven methods.
3. Switch Audio Mode to Stereo
Another way to fix Roku sync issue is by switching the audio mode on your Roku TV audio settings to Stereo.
Here’s how to go about that:
- Go to Settings > Audio

- Click on Audio mode, and switch to ‘Stereo’

- Still under Audio settings, click on HDMI. Now, change from ‘Autodetect’ to ‘Stereo PCM’
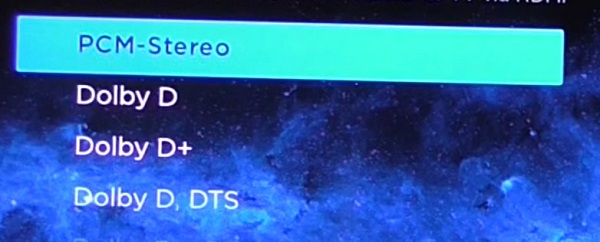
This should fix the sound issue and the audio should be in sync again.
4. Switch Volume Mode Off
I know it sounds ironic, but switching volume mode off is another confirmed way to fix your Roku device if the audio is out of sync or delsyed. Volume mode is a feature to improve sound experience on your Roku device, and turning it off is not the same as turning off the audio or muting your audio.
The reason why this works is because volume modes are not support for some audio formats.
When using volume modes, streams with surround sound format such as Dolby Digital, DTS, Dolby Digital Plus, and Dolby ATMOS may be converted to stereo. Therefore, if your Roku device is connected to an audio/video receiver (AVR) or sound bar, you may need to set volume modes to ‘Off’ to hear the surround sound format.
You can find and switch the volume mode off under audio settings.
- First, click on the star (*) button on your Roku remote control.
- Select ‘Sound Settings’
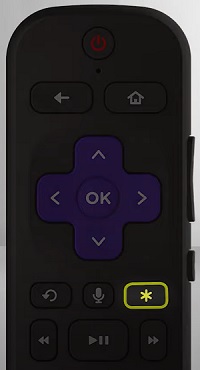
NOTE: On some channels, the star (*) button serves a different purpose and will not take you to the audio menu shown below. In such case, you can switch to The Roku Channel and follow the procedure from there.
Navigate to ‘Volume Mode’ and switch it “Off”
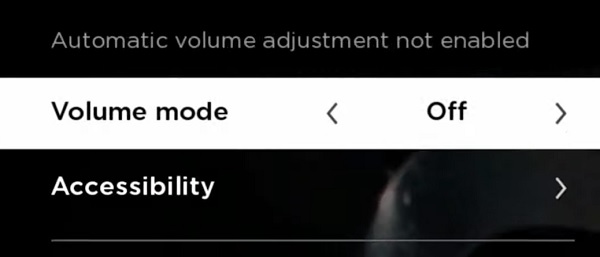
The audio sync issue should be fixed immediately the volume mode is turned off.
5. Reset Audio Settings
In some cases, the audio settings might have been messed up causing the audio to go out of sync with picture on your Roku device. In such cases, resetting your audio settings to factory default will fix the issue for you.
For some that might be wondering, this does not have anything to do with resetting the complete system of your Roku device as you will only be resetting the audio settings.
To reset Roku audio settings and fix audio sync issue, go to Settings > System > Advanced System Settings > Factory Reset > Reset TV audio/picture settings. Finally, press the Play/Pause button three times to reset Roku TV audio settings to the factory default.
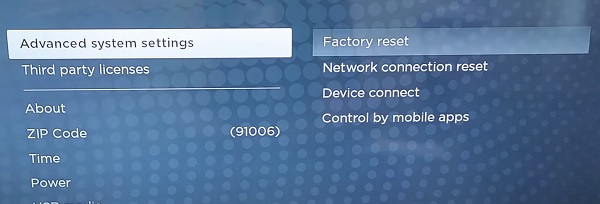

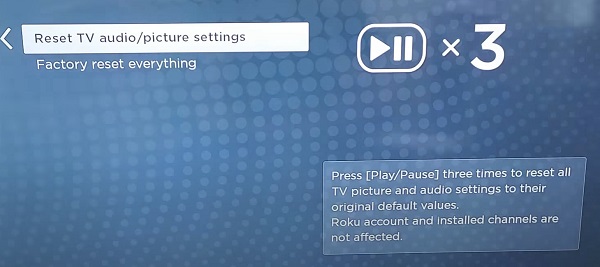
You will get a popup confirming that all the audio settings have been restored to the default settings.
6. Perform a Roku System Restart
Performing a system restart can fix a lot of issues on your TV, streaming devices and other electronics. The same can be same for a Roku with audio out of sync according to some users who have had the same issue in the past.
- Press Home on your Roku remote.
- Scroll and select Settings.
- Select System.
- Select System restart.
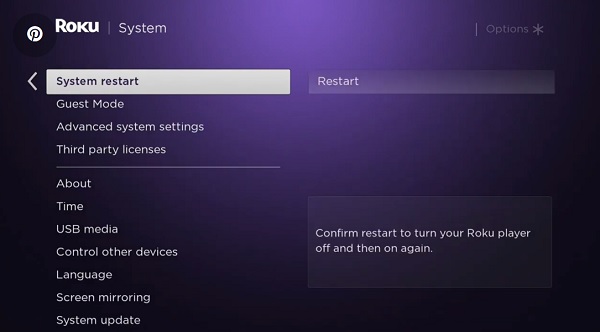
- Finally, click on Restart.
Once your devices boots up again, check if the issue has been fixed. Otherwise, let’s move to the next tip.
7. Check for Software Update
Another common reason why users experience audio or picture lag on Roku is outdated software. Hence, updating your Roku software can help fix the sound or picture delay issue.
To check and update your Roku software:
- Click on the Home button on your Roku device remote
- Select Settings > System > System Update
- Click on Check Now to manually check for any update
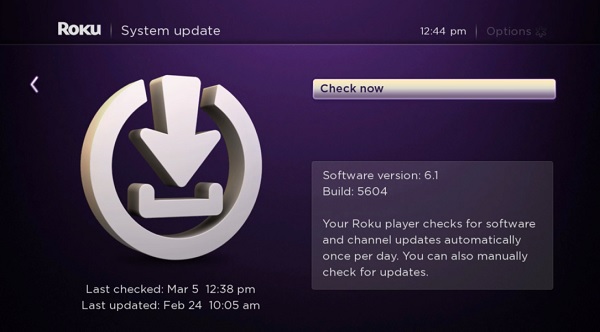
If there is any available software update, your Roku device will download it, install it automatically and then reboot once completed.
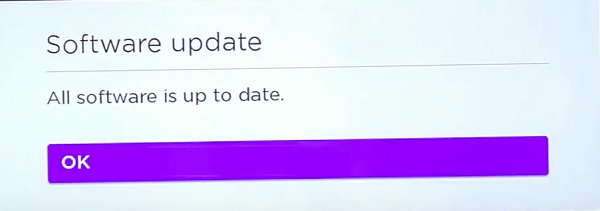
NOTE: Your Roku device should be connected to the internet for you to use this method. Otherwise, try the manual update method.
8. Check All Connections (Internet & HDMI)
Poor internet or HDMI connection can also be responsible for video or audio delay (audio out of sync) on Roku device.
First, you need to check the status and signal strength of your internet connection on your Roku device.
- To do that, go to Settings > Network > About, and see if it’s showing ‘Connected’ or not.
- On the same page, you will find the signal strength, is it showing ‘Poor’, ‘Good’ or ‘Excellent’?
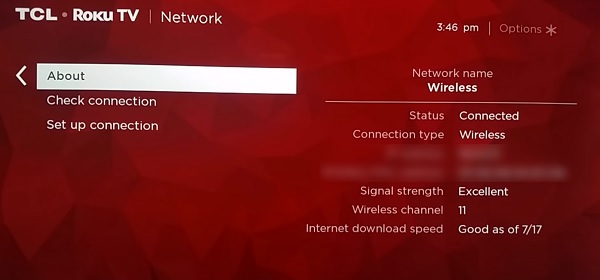
If the network is not connected or the signal strength is poor, this might be the reason audio is out of sync on your Roku device.
- Finally, click on Check Connection.
You Roku device will start checking your Wireless/Wired connection and Internet connection.
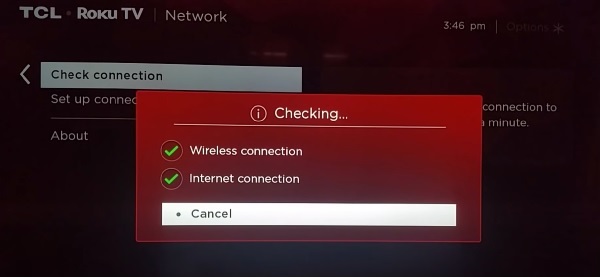
Once the check is complete, you should see a prompt showing ‘Connection check was successful‘
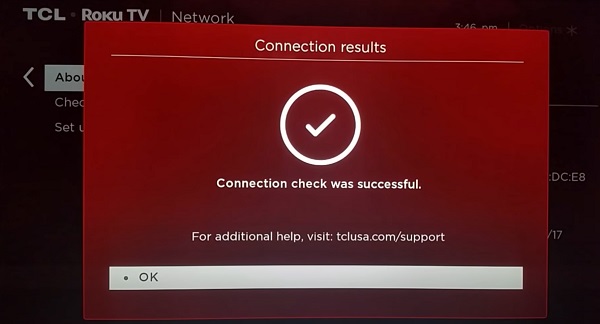
If the connection check was not successful, check your network router and setup the connection again.
Also, if you are using ethernet cable, check that the cable and plugged in properly.
Finally, check the HDMI cable and it is plugged in tightly.
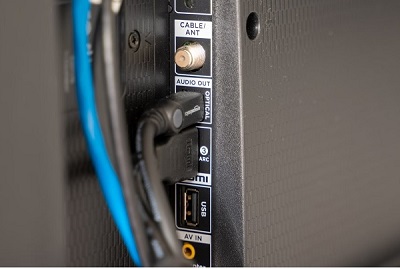
In addition, you can also switch the HDMI port in case the currently used one is faulty. If possible, try another HDMI cable too in case the one you have faulty.
9. Reset Roku Device to Factory Settings
Resetting your Roku device to factory settings can fix the audio out of sync issue.
NOTE: Factory reset will remove all the downloaded apps on your Roku device and any configuration you had before the reset. Also, you will need your Roku remote controller to set up your Roku TV once the factory reset is done.
With that in mind, this method has actually proven effective for so many users who had the same issue. The only reason why I put this method lower in the list is because it takes a bit longer compared to other methods above as you will have to re-configure your device like a brand new one from Wi-Fi configuration to channel installation among others.
Now, here’s how to reset your Roku device to factory settings:
- Click on Home button on Roku remote
- Scroll and select Settings
- Select System > Advanced system settings > Factory reset
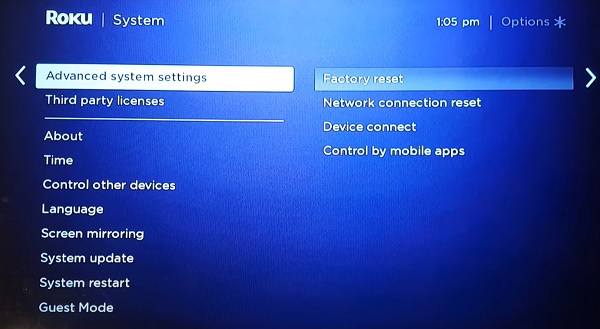
- Finally, enter the code displayed on the button right corner and click on OK.
Once the factory reset is successfully done, your Roku device will restart in the same state as a factory-new device. Next, proceed with the initial configuration.
Once configured, your Roku audio should be in sync once again.
10. Switch to Internal Speakers
Normally, the audio out-of-sync issue can happen even if you are using your internal TV speaker.
On the other hand, setting up a Sound bar, Surround sound system or receiver of any kind wrongly can be the cause of the issue.
In such case, you need to disconnect the external sound system and use your TV internal speaker as the sound output source.
- If the audio sync issue is fixed after switching to the internal speakers, then the issue is coming from the external sound system (either it’s faulty or it’s misconfigured).
- On the other hand, if the issue persists despite switching to the internal system, then the issue is with your Roku device. In such case, any of the tips highlighted above should get it fixed for you, otherwise, the only option you have left is to contact Roku support team.
11. Contact Roku Support
If you have followed all the tips stated above, your Roku TV audio should be in sync by now.
However, if your Roku audio is still out of sync after doing all that has been mentioned above, the only thing you can do is to contact Roku (or any of the Roku TV partner you use) for support.
Depending on the brand of Roku device you use, you can contact their support team with the phone numbers below.
Roku TCL: 1-877-300-8837
Hisense Roku TV: 1-888-935-8880
Sharp Roku TV: 1-888-935-8880
LG Roku TV: 1-800-243-0000
Insignia Roku TV: 1-877-467-4289
Philips Roku TV: 1-866-309-5962
Bottom Line
Roku audio out of sync can be caused by a number of things. In some cases, the audio is delayed (or lagging) behind the video. In other cases, the picture/video is laggy and audio is faster than it should be.
Whichever the case may be, you can get your Roku device audio back in sync by following the tips highlighted below:
- Clear Roku TV cache
- Power cycle your Roku TV
- Switch audio mode to stereo
- Turn off volume mode
- Reset audio settings
- Do a quick system restart
- Update your Roku system software
- Check internet and HDMI connections
- Reset Roku to factory settings
- Switch to internal speakers
- Contact Roku support
Let me know which of these tips worked for you in the comment section below. Also, kindly share the guide with others so they can benefit from it too.

Roku system restart works for me but it’s not a permanent fix. It usually happens again in a few days. I have had Rokus for years and I don’t understand why all of a sudden I’m having this problem. I have had my current one for several years. I am starting to think I may need to get a new Roku
Try the other fixes as well first if the restart only fixes it temporarily for you.
HALLELUJAH IT’S FIXED! Marry me. Thank you for saving me 17 hours of scouring the internet.
Lol, glad to hear that Sara.
Super!!! It worked the first time! Thank you so very much!
1. Clear Roku TV Cache worked for me. A big-time thank you from me.
Glad to hear that Christopher, thanks for your feedback.
Thank you so much. I was certain the problem was with my TV. When adjusting audio delay didn’t fix the sync lag, I checked with basic cable and–no delay. So then I turned to Roku. The soft reset didn’t fix the lag; cables and opical input were all okay. Before doing the factory reset, I searched online and found your Tech Profet post. The 5-1-2-2 method fixed the problem. You’re the best!
Good to know that it worked for you, Patricia.
Thanks for the feedback.
pressed home 5 times up once rewind twice ff twice and it didn’t reboot. Was this posted on April 1st?
Press it in quick succession, it should work. Also, make sure the remote actually works.
This has worked for many people. Moreover, it’s a popular key combination to reboot Roku devices.
Thank you so much! You saved me so much time and aggravation. I was trying to reset the sound on my tv, thinking that’s what it was. When that didn’t work, I tried looking into ROKU online for out of sync sound and luckily I found your instructions right away and it worked like a charm. Can’t thank you enough.
You are welcome Carolyn, I’m glad you found it helpful.
The very first tip worked! Thanks so much you are awesome!
Glad you found it helpful, and thanks for the kind words.
You rock! Thanks!
You are welcome, thanks for the kind words.
Excellent! This worked perfectly.
Our Roku was making popping sounds. We cleared the cache and all is working properly now.
Thank you!
Glad you found it helpful, and thanks for dropping a feedback.
Worked ! Ty