It is become quite a bit of a common issue when you try to get some power into your Joy-Con and the Right Joy-Con is not charging.
The issue can even get worse if your Right Joy-Con is completely dead and won’t even sync anymore to your Nintendo switch.
In some cases, it may even charge for a few minutes and then stop charging. In most cases, it won’t charge at all!
The good news?
I will show you how to fix your right Joy-Con that’s not charging no matter which category you fall, whether:
- You still have some little power on your right Joy-Con or
- Your right Joy-Con (+ side) is completely dead
If that sounds like what you are looking for, then let’s dive right in!
Right Joy-Con Not Charging
To fix this, detach the right Joy-Con from Nintendo switch, wipe the clips of the Joy-Con and connecting rail of the Nintendo switch with microfibre cloth. Press the small connect/sync button on the Joy-Con until green light starts to blink. Finally, attach the Joy-Con and it will start charging.
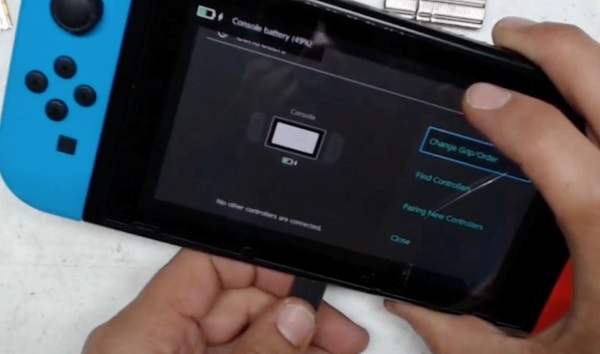
1. Detach the Right Joy-Con
Forcing your right Joy-Con against the Nintendo switch won’t fix the charging issue. Once it has made that ‘click’ sound and it’s not charging, it’s simply not charging.
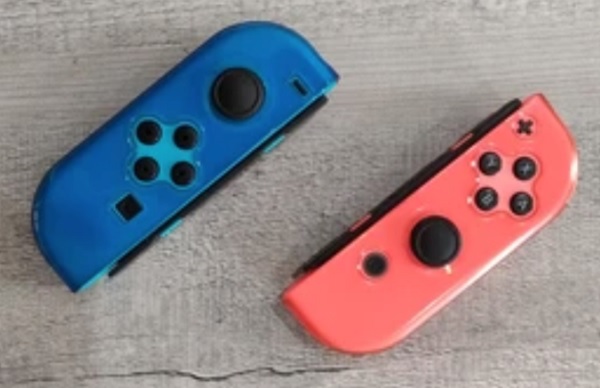
First thing you need to do? Detach the right Joy-Con from the switch.
Done that? Let’s move on.
2. Clean the Right Joy-Con & Connecting Rail
The most common reason why the Right Joy-Con won’t charge is dirt in the Joy-Con clip and along the connecting rail on Nintendo switch.
The dirt/dusk accumulates and reduces the surface connection between the Joy-Con and the Nintendo switch, causing it not to charge.
Most users who have this issue will be able to get it fixed by just getting it cleaned the right way.
It’s important you clean both of these the right way or you might end up doing more hard to the Joy-Con or worse, even the switch itself.
But, it’s very easy to do. You just need to take some precautions. I have also attached a video right after the instructions below for visual guide.
(i) Cleaning the Right Joy-Con:
To clean the right Joy-Con, you need a microfibre cloth (you may also use a cotton swab).
Carefully place the microfibre cloth just inside behind the Joy-Con connecting clip to and wipe it to remove any dirt/dust.
Also, wipe it across the face of the right Joy-Con to clean any dirt on the surface.
(ii) How to Clean Connecting Rail on the Switch
Here, you need a Q-tip and a small solution of isopropyl alcohol as a cleanser.
There are 2 steps here:
- First, gently wipe the connecting rails on the switch with a damp end of the Q-tip
- Then, wipe immediately with the dry end.
The damp here is the end that has been dipped in isopropyl alcohol (and squeezed so that it’s not wet). If it’s too met, the liquid may enter into your Nintendo switch and you know what that means.
You can watch the video below to see how to do it:
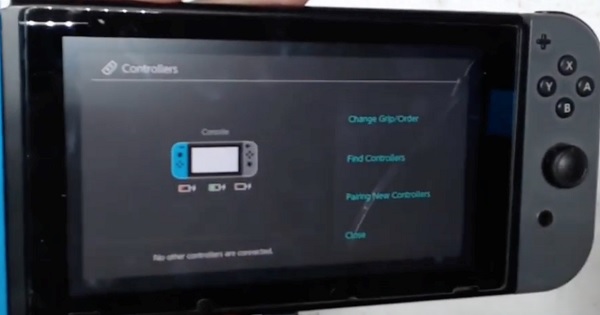
3. Press the Connect/Sync Button on the Joy-Con
This is the next thing to do. A lot of users forget that there’s a sync/connect button on the Joy-Con (or maybe what it does). As a result, they connect their right Joy-Con to the switch, but the switch won’t even recognize or charge it.
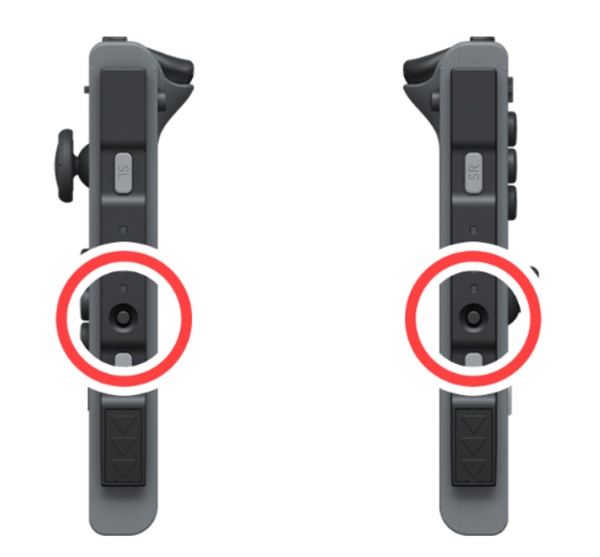
It’s the little round button at the middle of the Joy-Con as you can see above.
NOTE:
- If the Joy-Con battery is completely dead, then pressing the button won’t get it to turn on or blink at all in the first place. In that case, jump to the next section below where I show you how to fix the right Joy-Con even if the battery is completely dead.
- Also, If the connect/sync button on the right Joy-Con is missing probably from a drop or something, then the Joy-Con might be faulty itself and you need to get a new one. You can however still check the next section to see if that works for sure before you replace anything.
However, if you don’t fall in any of the categories above, here’s what you need to do next:
Press on the connect button (the small round button on the connecting side of the Joy-Con), until the green sync lights start to blink.
Now, you are just one step away from getting your Joy-Con to charge.
4. Attach the Right Joy-Con Back to the Switch
If you don’t have any issue with the connect/sync button and the light on the right Joy-Con is blinking, go ahead and swipe your Joy-Con across the connecting side of the switch till you hear the click sound.
Now, your right Joy-Con should be charging.
Hence, if your right Joy-Con won’t charge, do the following:
- Detach the right Joy-Con from the Nintendo switch
- Clean the right Joy-Con & connecting rail with microfibre cloth and Q-tip
- Press the sync button on the Joy-Con until green light starts to blink
- Attach the right Joy-Con back to the Nintendo switch and it will start charging perfectly
Right Joy-Con Completely Dead and Not Charging
On the other hand, if your right Joy-Con is completely dead, it means you can get the connecting lights to blink using the sync button.
Like I said earlier, there’s a way to fix that – 3 ways actually.
No matter what, at least one of these methods will get it fixed.
First of all, make sure the Joy-Con and connecting rail have been cleaned as explained and shown in the previous section in this guide.
Whether or not cleaning the right Joy-Con fixes your issue, it’s best to cross it off the list. Moreover, it’s the easiest & fastest thing to do (and also with very high rate of getting the issue fixed!).
You don’t want to go through the whole process below and conclude that it’s not charging when the issue is just the dirt/dust stuck in the connecting sides.
That said, let’s begin with the first method.
Method 1: Make Sure Switch Works & Charge for Hours
Now, this method will work if neither the switch nor the Joy-Con is faulty.
What you need to do is simple:
First, you need to be sure that the right Nintendo switch connecting rail works.
One way to do that is to find a working right Joy-Con that’s not completely dead (probably from a friend) and see if your Nintendo switch charges it.
- If it does charge the other right Joy-Con, you are sure it still works and you can go ahead with this method.
- If it doesn’t charge the other right Joy-Con too, then jump to method 2 below.
- What if you can’t get another right Joy-Con to test it? Then, you can be sure where the issue is from yet. Therefore, try both methods.
Now that you’ve confirmed that your Nintendo switch works, leave your Joy-Con in your Nintendo switch for hours (even though it’s not showing any signs of charging on your switch since it’s completely dead).
Some users who had the same issue where able to fix it (and got a fully charged Joy-Con) after leaving it plugged into their Nintendo switch for hours.
Just literally forget about it while plugged in, and be patient.
If you have done this for hours and it still doesn’t fix it or you just don’t want to wait for that yet, then it’s about time you open up your switch which takes us to the second method.
Method 2: Open the Nintendo Switch & Fix Circuit Short
Now, don’t get scared because it requires you to open up the switch.
It’s not a technical thing to do at all. You will just be loosing some screws and putting them back in (at least that’s the simplified version).
By the way, I have also attached a video below the explanation for visual demonstration.
Now, let me explain what we are trying to achieve here.
There is a circuit in the board of the switch that houses both the fan and the Joy-Con connectors. If there is a short in this circuit, it causes the Joy-Con not to charge. This short in the circuit is a common issue.
What we want to do here is the fix the short in the circuit so that power reaches the Joy-Con connector and it charges when you plug it in.
Now, let’s get into it.
(i) Open up the Nintendo Switch
There is nothing much to explain here. Get a screw driver, loosen the screws and open up the case so you can see the board.
If you don’t know what the diode looks like, go ahead and watch the video below:
That should help get it fixed.
(ii) Temporarily Unplug the Battery Connector
When dealing with technical fixes, it’s best to disconnect the battery most of the times.
The way you can do this is the unplug the battery connector.
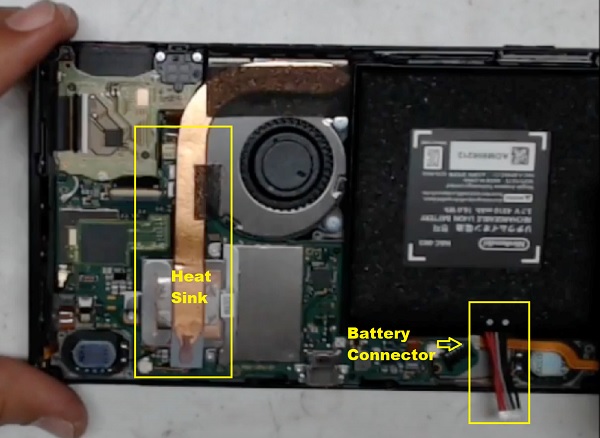
(iii) Temporarily Remove the Heatsink
Remember the fan connector we talked about earlier? It’s just below the hear sink (also shown the screenshot above).
Therefore, to access the fan connector, we need to remove the heat sink.
To do that, loosen the screws holding it in place and carefully lift it up to see the circuit we need to work on.
NOTE: Be careful not to pull hard on it while trying to remove it as it’s quite fragile.
(iv) Remove the Diode
Now, this is the main thing we are trying to fix.
The diode is the one causing the short in the circuit, making the Joy-Con not to charge.
A diode conducts current primarily in one direction (it has low resistance in one direction, and high resistance in the other direction).
The diode isn’t a necessity, and the game will run perfectly well without it.
In fact, in a new revision of the same Nintendo switch board, the diode was not even included at all.
(v) Put back everything in place and assemble
Before you assemble it back, make sure you:
- Put the Heatsink and the screws that hold it back in place
- Plug back the battery connector
- Next, do a quick check and make sure you don’t have anything left out
- Finally, assemble the switch and put back the casing screw
Turn it on, connect the Joy-Con and it should be charging perfectly well.
Method 3: Buy a Charging Dork for Joy-Con
if the switch isn’t charging at all, you last option is to buy a charging dork for your Joy-Con.
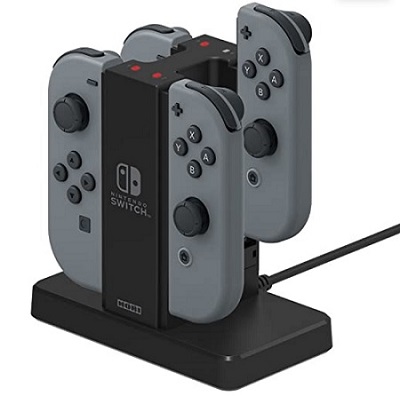
At least, this is cheaper than getting a whole new Nintendo switch.
Method 4: Contact Nintendo’s Customer Support
If you are within warranty period for your Nintendo switch, then you can contact Nintendo to get a replacement or fix the issue for you at no extra cost.
Therefore, if your right Joy-Con is completely dead and won’t charge, there are 4 ways to fix it:
- Confirm that the Nintendo switch can charge another Joy-Con, then plug your Joy-Con for hours even if it doesn’t show charging notification on the switch
- Open up the Nintendo switch and get rid of the diode that causes short in the circuit
- Buy a charging dork for your Joy-Con
- Contact Nintendo’s customer support for fix or replacement at no cost if you are still under warranty
Now, that is all for now. If you found the content helpful, kindly share your feedback by using the comment section below.
Also, spread the information by using the share buttons so others can benefit from it too.

Charging dork???