A lot of Sony TV owners have reported experiencing various unexpected black screen issues, such as the screen going black while the sound continues to work normally, a black or blank screen appearing immediately after powering on the smart TV, or the screen just going black at random.
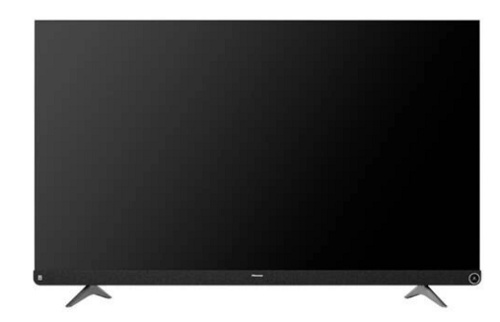
While the issue can be very frustrating, there are many troubleshooting steps that can help you identify and fix the black screen problem on your Sony smart TV.
In this article, I will guide you through these solutions, step-by-step, until you either resolve this issue or realize it’s time to upgrade your smart TV.
But first, allow me to explain why you are facing these problems…
Contents
Why Is My Sony TV Screen Black?
Before we dive into the solutions, you must first look into the potential causes that can lead to a Sony smart TV with a black screen (sound but no picture), so that you can address your issues in a more direct and efficient manner.
Here’re all the common causes:
- Software bugs or glitches.
- Loose or damaged power or HDMI cables/ports.
- Incorrect or faulty input source.
- Faulty hardware components (such as the display panel, the backlight, the power board, or the main board, etc).
- Power supply issues (such as power outage, a faulty power outlet, power supply board failure, etc).
- Misconfigured settings.
- Overheating.
Now, let’s troubleshoot!
How to Fix Sony TV Black Screen / Sound But No Picture
Follow the step-by-step troubleshooting guide to fix the Sony TV black screen of death issue.
1. Check the Connections
First and foremost, it’s crucial to examine the connections between the Sony TV and the power source, as well as between the TV and the input devices, since a loose or faulty connection is frequently the root of most TV screen troubles.
Now, what I mean by checking the connections is to inspect all the necessary cables and ports that are used to either supply power to the TV or display the image.
Simply follow these steps to rule out the potential of bad connections:
- Turn off your Sony TV and disconnect it from the power source. Otherwise, both you and your device will be at risk.
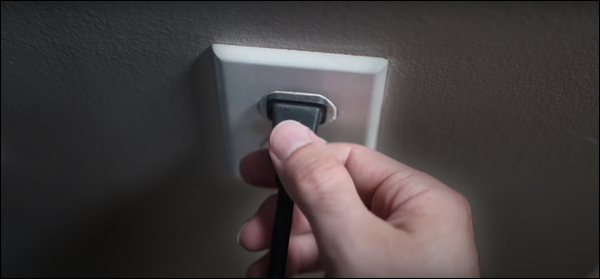
- Take the power cord out and look closely for any obvious signs of damage, including frayed ends, bent connectors, twisted wires, etc.
- In a similar manner, unplug the HDMI cable (or any other display cable you’re using) and closely inspect it for signs of damage.
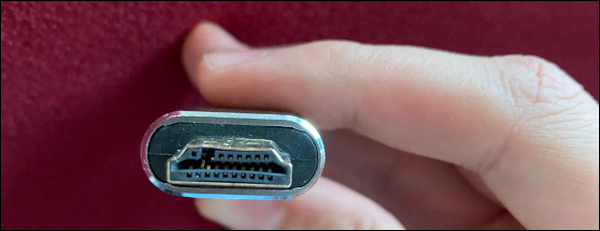
- Many people overlook the ports, so avoid making the same mistake and inspect the HDMI (display) and power ports for bent or broken pins, physical defects, or evidence of corrosion.
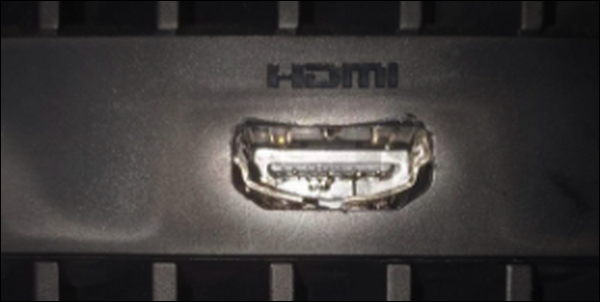
- Dust should be removed from all contacts and ports using compressed air.
- If it’s possible, consider using brand-new/different HDMI and power cords to take things a step further.
- Now, when you reconnect all the cables, ensure that they are firmly inserted into their correct ports on both ends.
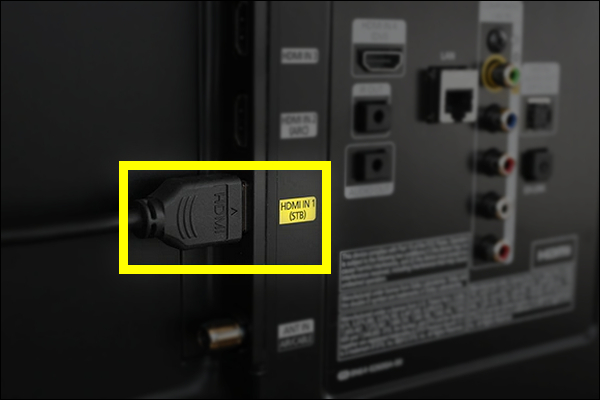
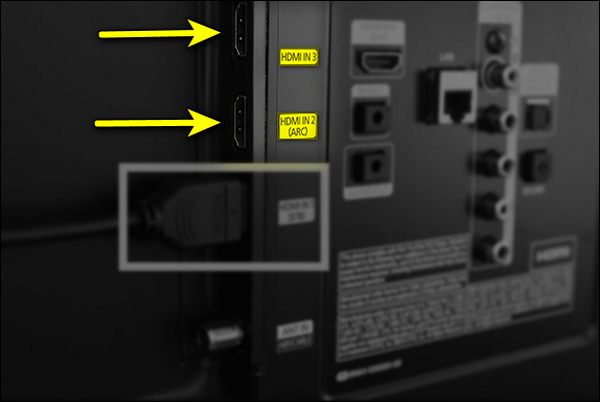
- When it comes to the HDMI cable specifically, try plugging it into a different HDMI port to rule out the possibility of a defective display port.
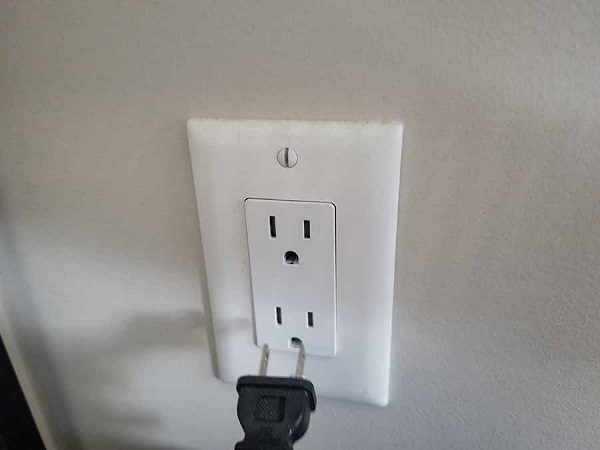
- Finally, I advise switching the power source and plugging your TV into a different power outlet to rule out the possibility of an insufficient power supply.
Now, you can turn on your Sony smart TV to see if you’ll be greeted with a lovely colorful screen or still a black screen of death.
2. Check the Input Source
If you’re someone who uses multiple input devices with your TV (such as game consoles, streaming devices, etc.), or if you have recently switched between the HDMI (or input) ports, the Sony TV may be set to the incorrect input source, leading to a black screen with no output.
For this reason, you must manually check and, if necessary, change your TV’s input source to the correct one to ensure proper image output.
To do so, just follow these simple steps:
- Press the “Input” or “Source” button on your remote control—look for an icon with arrows pointing into a box—to access the input source menu on your TV’s screen.
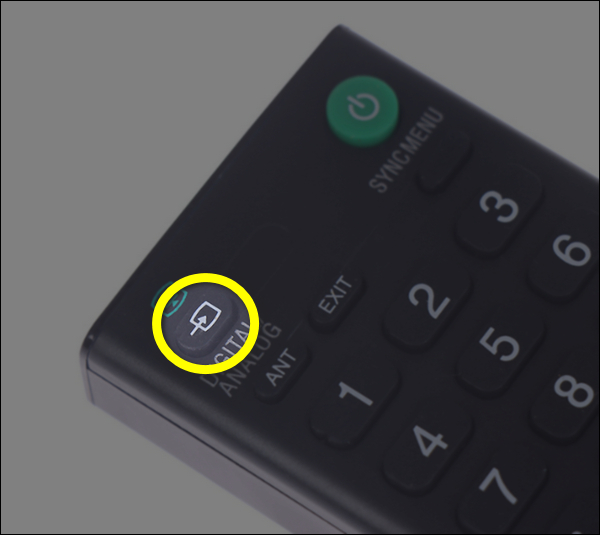
- From the list of available input sources, select the one that matches the input device you’re using with your TV.
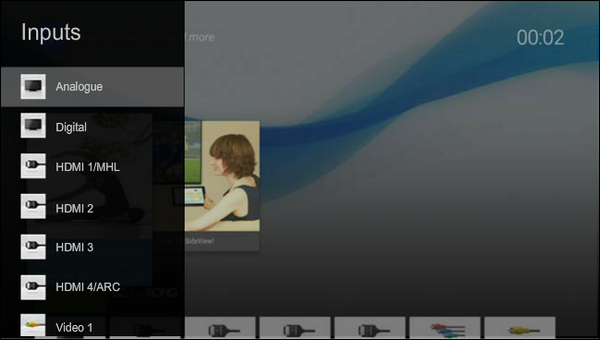
- Finally, don’t forget to press the Enter or OK button on the remote to confirm your selection.
Now, your Sony BRAVIA TV should display the output or content of the selected input device, which should resolve the issue if it was caused by an incorrect input source.
If not, and you still see a black screen, move on to the next step!
3. Perform a Power Cycle
Power cycling your Sony TV will refresh its software and also hardware components, clearing any bugs, glitches, or electrical interferences that could be the main factors to the black screen of death.
It can help you fix a Sony TV with sound but no picture.
Now, to power cycle or power rest your Sony Smart TV, simply follow these steps:
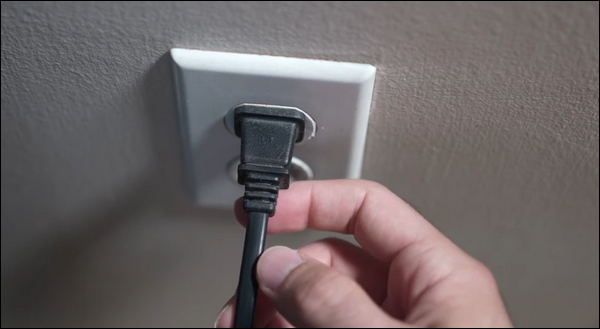
- Directly unplug your Sony TV’s power cord from the wall outlet without turning it OFF.
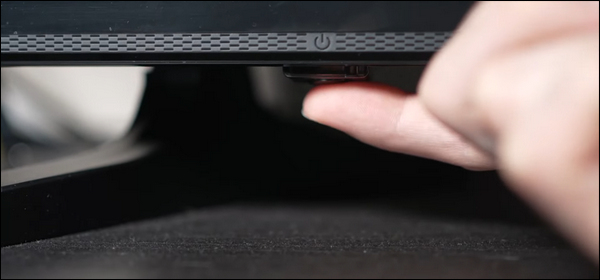
- Press and hold the power button on your TV for about 60 seconds to fully discharge any residual power.
- Now, wait for at least 5 minutes before you plug the power cord back.
- Finally, turn ON your Sony TV and see if the blank/black screen issue is resolved.
It’s that simple, right?
If turning the TV’s power on and off doesn’t solve the problem, you’re likely dealing with a complex issue that requires advanced approaches.
Don’t worry, I will discuss these approaches later in the guide.
4. Test Different Input Devices
There is a chance that your Sony TV is functioning properly, but the display issues are within or caused by the input device connected to the TV.
Therefore, you should connect and test a different input device with your Sony TV to rule out the possibility of a faulty input device.
Simply, plug in a different input device, such as a gaming console, DVD player, or streaming device, and then set the TV input configuration to the corresponding port, as described in solution #2.
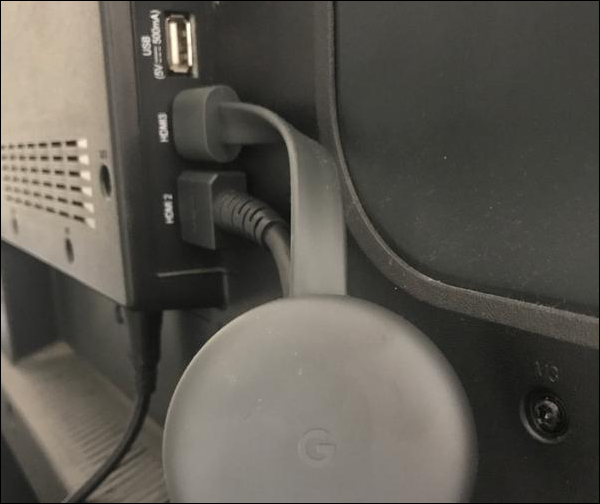
Next, check what your screen is displaying.
If the black screen is gone, then the problem is with the original input device, not your Sony TV.
If the problem persists despite testing multiple input devices, then it’s evident that your Sony TV itself is defective.
5. Turn OFF Picture Reset Mode
Sony TVs have this mode that’s called “demo” or “retail” and it’s designed to showcase the TV’s capabilities in-store.
This “retail” mode includes an option or feature called Picture reset mode.
If it’s enabled, and you disconnect and reconnect the power cord before turning on the TV, the power goes into standby for about 10 minutes to perform panel calibration, which adjusts the colors and brightness of the TV screen to ensure that it displays accurate and consistent colors.
After the panel has been calibrated, the TV turns on again and then displays the output content.
Now, it’s likely that this feature is turned ON in your Sony TV, which is why the screen goes black when you turn on your Sony Bravia TV.
Therefore, you should check and disable this “retail demo mode” including the Picture Reset Mode option. Here’s how to go about it:
-Depending on the Sony TV model you own, the process may differ.-
On Android TV models:
- Press the HOME button on the remote and then select Settings.
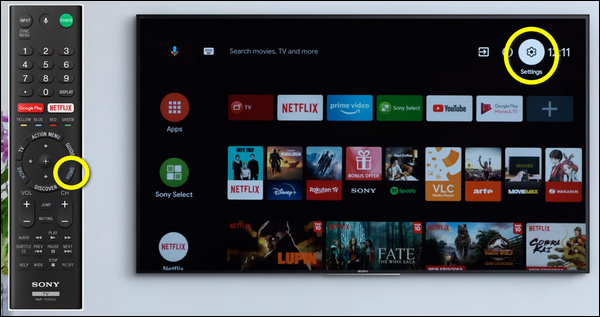
- Now, the next step may be different based on the TV menu options:
- Select System > Retail mode settings > turn OFF Demo Mode and Picture Reset Mode.
- Select Device Preferences > Retail mode settings > Turn OFF Demo Mode and Picture Reset Mode.
- Select Retail mode settings > turn OFF Demo Mode and Picture Reset Mode.
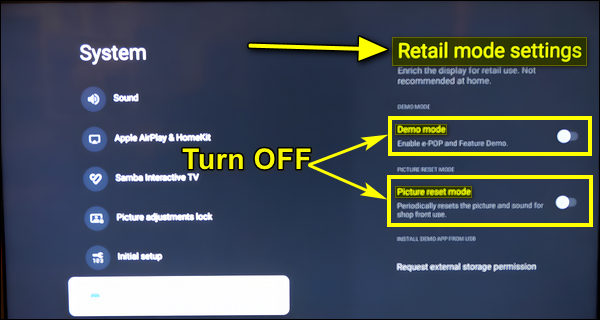
Other Models:
- Press the HOME button and then select Settings.
- Again, the next step may be different based on the TV menu options:
- Select Preferences > Shop Front Display Setting > Turn OFF Demo Mode and Picture Reset Mode.
- Select System Settings > General Set-up > Turn OFF Demo Mode and Picture Reset Mode.
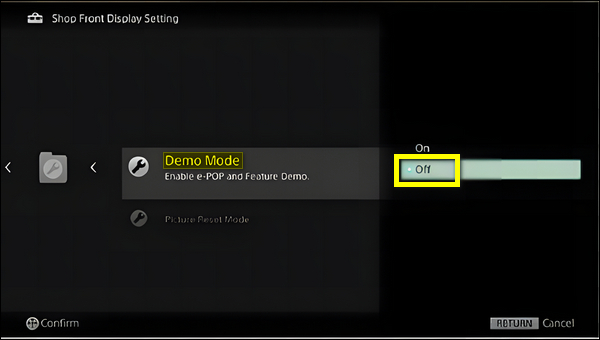

That should fix your Sony TV black screen of death issue. Otherwise, move to the next step.
6. Reset Picture Settings
One possible solution we turn to in cases when there’s a display issue like flickering, black screens, vertical or horizontal lines and other screen issues, is resetting the picture settings to the factory default.
I don’t need to explain why resetting the picture settings to their default factory values can fix problems caused by incorrect adjustments or settings.
To reset the picture settings on your Sony Bravia TV, follow these steps:
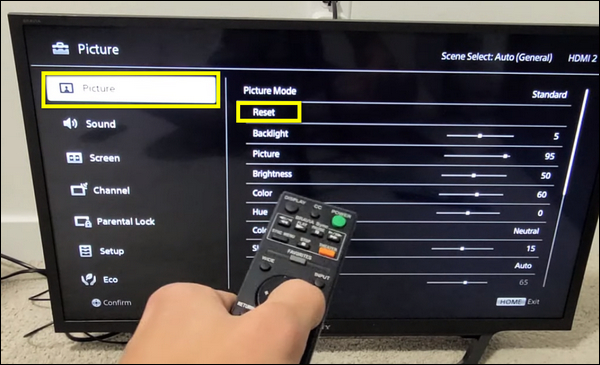
- Press the Home button on your remote control and navigate to Settings then Preferences.
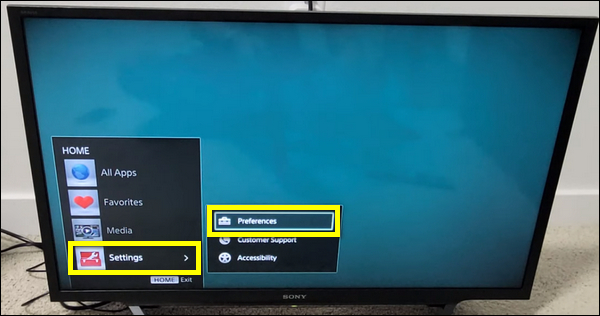
- From the Picture settings, go to Reset and select it using the OK button.
- Now, select OK to confirm and initiate the resetting process.
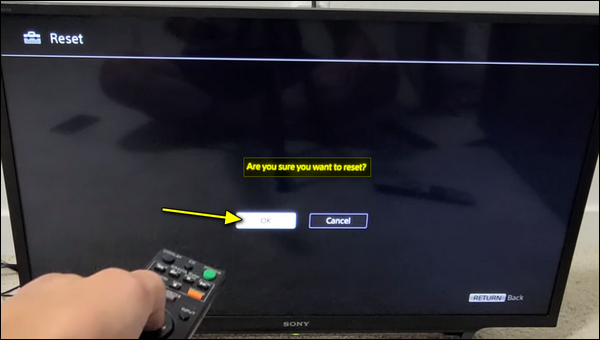
You’ve now eliminated the likelihood that incorrectly adjusted picture settings are to blame for the display issue.
If resetting the picture settings didn’t do the job, then it’s time to factory reset the whole TV’s data and settings.
7. Factory Reset Your Sony Bravia TV
When you perform a factory reset on your Sony TV, any custom settings and configurations you’ve made, which may be the cause of this black screen issue, will be cleaned.
Here’s how to reset a Sony Bravia TV with black screen to factory settings:
Note: Due to the fact that the process of resetting a Sony TV to factory settings varies by its model, I cannot provide a single set of instructions. Instead, I will demonstrate three methods. If none of these instructions for resetting to factory settings worked for you, check the user manual of your Sony TV for accurate details.
Method 1: Using Settings options
If your screen is dark but you can still see some parts of the screen, this method might work for you. Otherwise, try method 2 or 3.
- Press the HOME button on your remote, then select Settings.

- Now, the next step may be different based on the TV menu options:
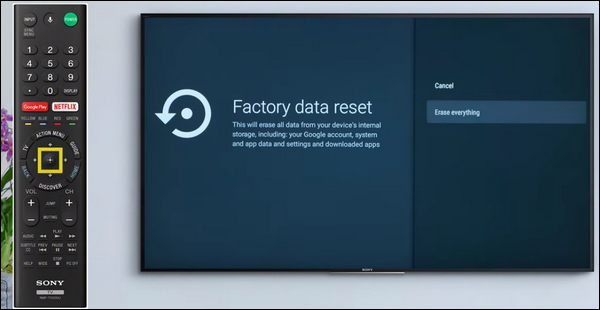
- Navigate to System > About > Reset > Factory data reset > Erase everything > Yes.
- Navigate to Device Preferences > Reset > Factory data reset > Erase everything > Yes.
- Navigate to Storage & reset > Factory data reset > Erase everything > Yes.
Method 2: Using Buttons
This method can be used to reset Sony TV with black screen.
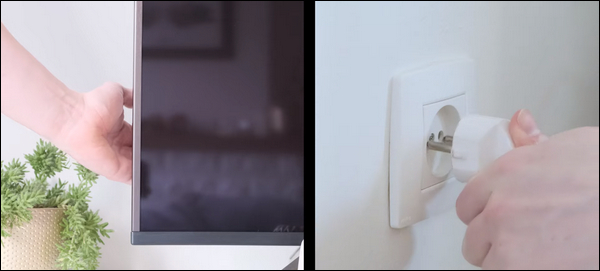
- Unplug the Sony TV’s power cord directly from the wall outlet.

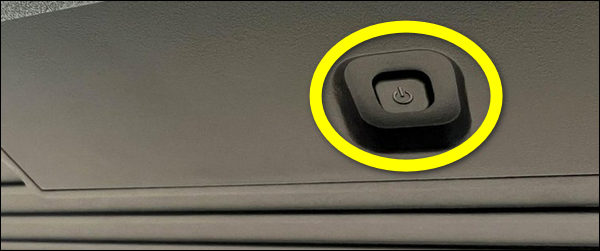
- If your TV has 3 buttons, press and hold all of them at the same time.
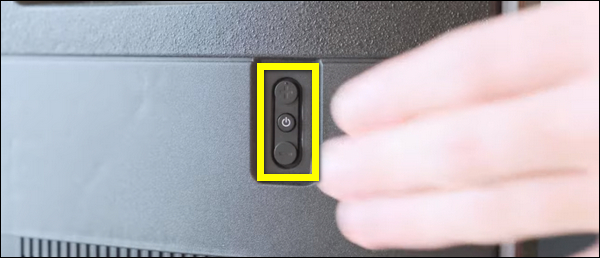
- If your TV has 1 button, press and hold that one button.
- While holding the buttons, plug the TV back.
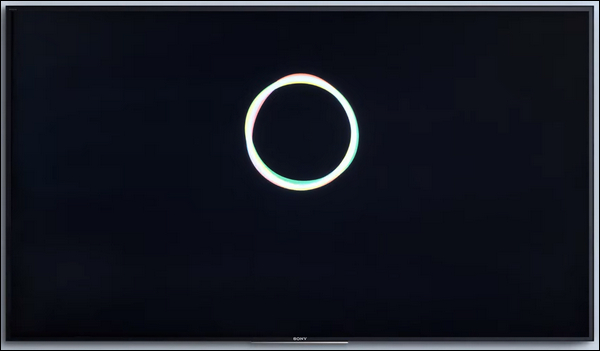
- Wait until the TV turns on and begins the factory reset process.
Method 3: Using Buttons (remote + TV)
This method can also be used to reset Sony TV with black screen.
- Your Sony TV must be turned ON.
- Press and hold the UP button on your TV’s remote control.
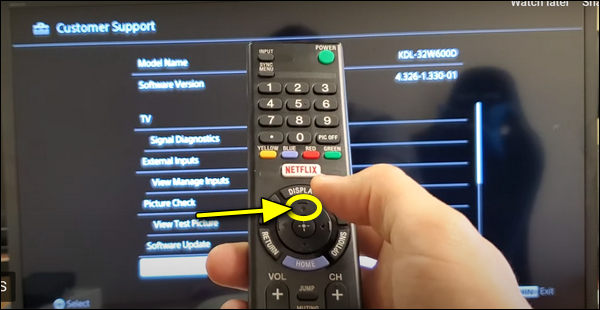
- While holding the UP button, press the power button on your TV.
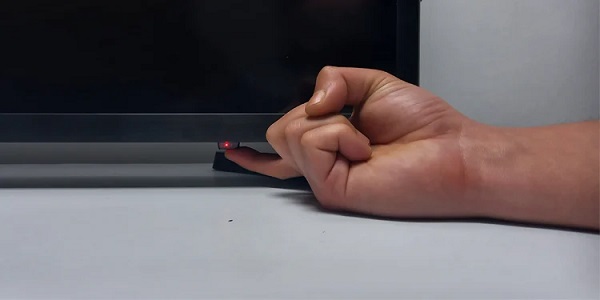
- Your TV will restart and begins the factory reset process.
After the factory reset is successfully completed, the initial setup process will begin. After that, you can see whether or not the black screen issues persist.
8. Check for Backlight Failure
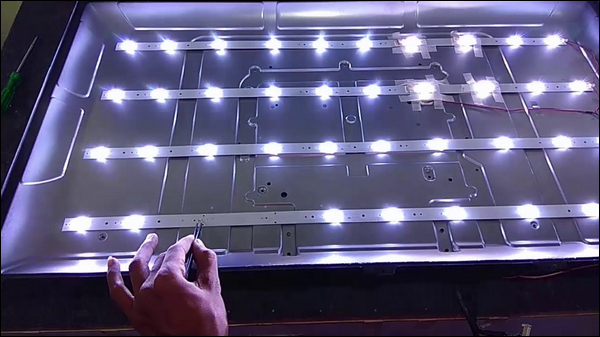
The TV’s backlight is the source of light that illuminates the screen and provide the necessary illumination for the pixels to produce the visuals, which makes it possible for you to see the images on the LCD TV screen.
It’s very common for backlight failure to cause the screen to go black or dim, even though the audio may still be working just fine (sound but no picture). Therefore, you should check the backlight of your Sony TV for faults.
How do you perform that? Simply follow the steps below:
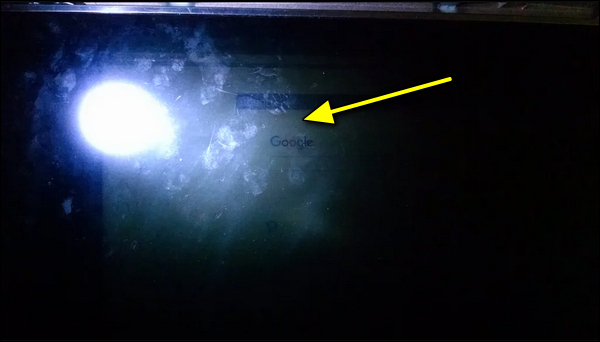
- To achieve the best results and be able to see any backlight defects clearly, ensure that the room in which your TV is located is completely dark.
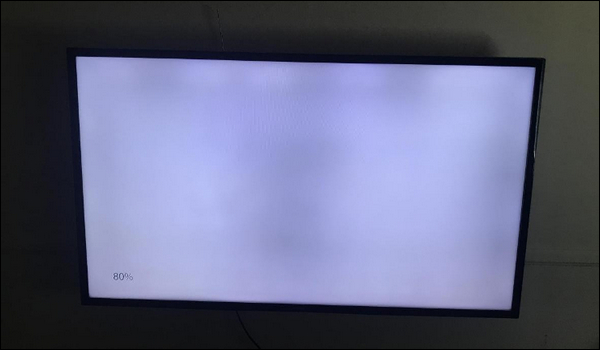
- Turn on the TV and closely shine a flashlight on the TV’s screen and check to see if any images can be seen through. If you see a dark image—such as when your screen’s brightness is set to the lowest—this indicates a backlight failure.
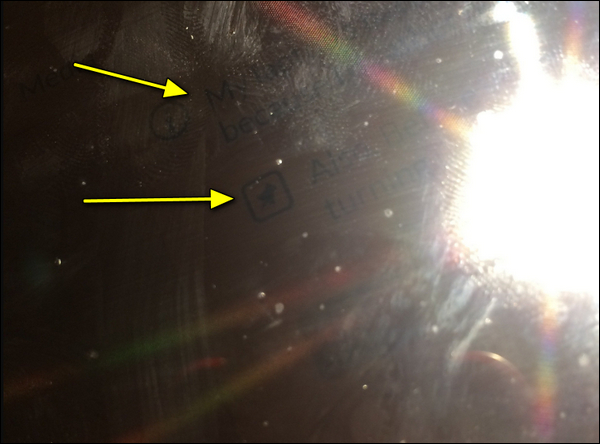
- Next, look for any signs of light bleeding from the edges of the screen. If you see any, that’s an indicator of a backlight failure.
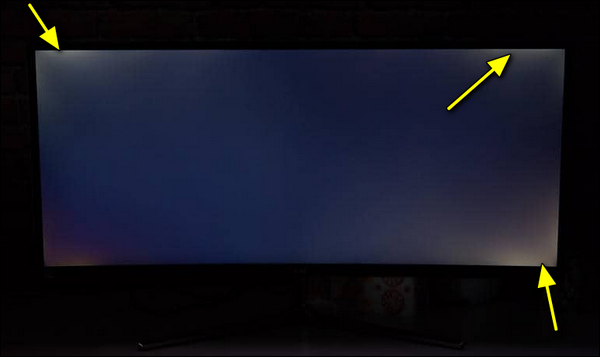
- Don’t forget to also look for any dark patches or areas that appear dimmer compared to the rest of the screen.
- If you detect any signs of backlight defects or malfunctions, you have to seek help from a TV repair service, which will most likely repair the backlight strips by replacing them.
9. Disconnect and Reconnect the T-Con Cables
Although trying advanced fixes without enough experience can potentially cause additional damage to the TV, but in many cases, just disconnecting and reconnecting the ribbon cables that connect the T-Con board, the motherboard, and even the LCD panel can fix various TV screen issues.
The T-Con board’s role is to process and control signals received from the TV’s motherboard so that they can be displayed on the screen properly.
Therefore, if the connection between the T-Con board, the motherboard, and the LCD panel is loose or faulty, expect all display issues to occur.
In order to guarantee that T-Con Connections are not to blame for the black screen of death on your Sony TV, you must disassemble the TV and reseat the T-Con cables as follows:
Note: To prevent further damage to the TV, approach the internal cables and components with care and without using force.
- Please turn off your Sony TV and unplug it from the wall outlet.

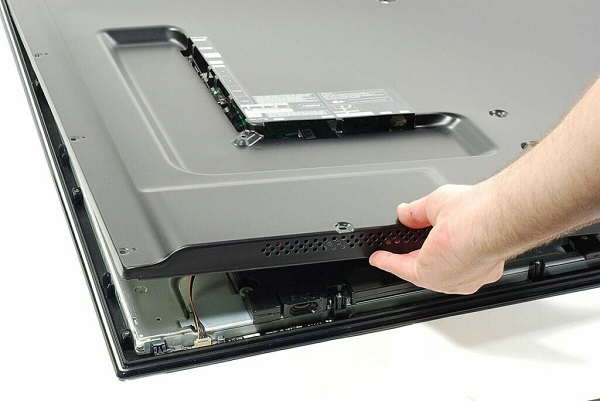
- Remove the back cover of your TV to get to the parts inside.
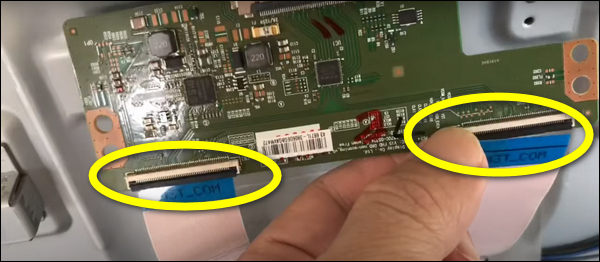
- Locate the T-Con board location (this varies depending on the type of your TV).
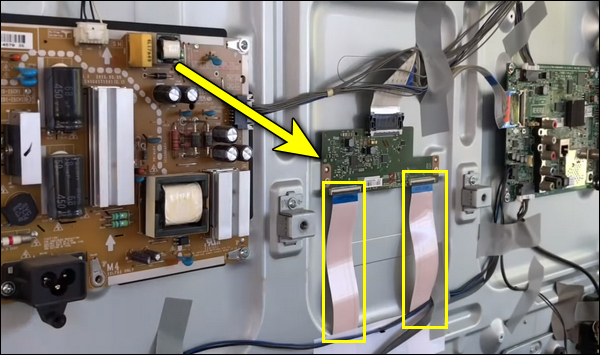
- Carefully pull the T-Con ribbon cables out of the connectors.
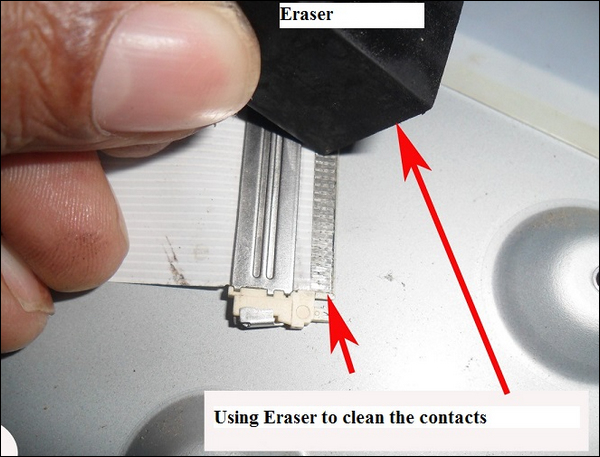
- Clean the contacts on the ribbon cables with a pencil eraser.
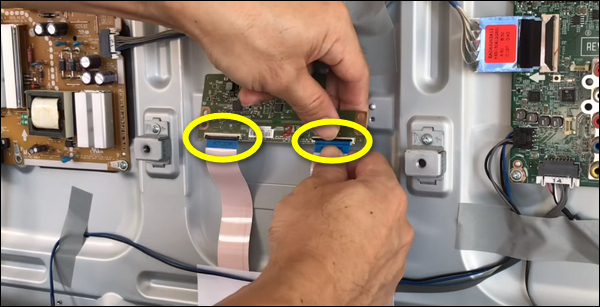
- Firmly reinstall the T-Con cables into their place.
- Reassemble everything while being cautious NOT to twist any wires.
- Now, you can power on the TV and check if the screen still goes black or not.
If you still have a black screen, then there’s only one thing left to do.
10. Ask for Expert Help
You’ve done all you can at this point, therefore it’s time to contact Sony customer support or a qualified technician who will be able to help you with your difficult black screen situation since they have the necessary skills, knowledge, and tools to do so.
All you need to do is either:
- Contact Sony customer support. There are several ways to reach them (Live chat, text with an agent, request an agent to call you, or simply call them).
- Contact a reliable local TV repair shop in your area.
In both cases, the more information you can provide about your TV’s model, the nature of the problem, any previous attempts to fix it, etc., the better.
Conclusion
Fortunately, most of Sony TV black screen issues can be addressed by just following the methods outlined in this guide.
However, there are some cases in which you are limited by your knowledge, skills, and tools. As a result, you have to seek professional help, either from Sony support or a qualified technician.
Finally, if you know any effective steps that we didn’t mention in this guide, please share them with others in the comment section, as it may help them overcome this frustrating situation.
