In this, I am going to discuss everything you need to know about Emby Roku in 2024.
First, we will look at the Roku requirement for Emby channel and how to add Emby media server channel on Roku. Also, I will show you how to install the channel even if your streaming device does not meet the requirement.
Next, we will look at how to connect your media server on Roku device. Finally, I will discuss what you can do if Emby is not working on Roku (whether it’s TCL or Hisense) and some alternatives you can use.
There’s no time to waste, let’s dive right in!
Emby Roku Requirement
Before you can add Emby channel on your Roku device, your Roku device has to be running at least version 7.5 4099 of the Roku firmware, and this applies to any Roku model.
However, if you have an older version of the firmware, you can update your firmware version (the video below can show you how to do that easily).
This applies to all Roku models including Roku streaming stick, Roku Premiere+, Roku express, Roku Ultra, and all RokuOS TV brands like Hisense Roku TV, TCL Roku TV, Onn. Roku TV, Westinghouse Roku TV, Element Roku TV, RCA Roku TV and others.
Otherwise, you can install the old Emby for Roku app by downloading it as a zip file from the old repository.
If your Roku device meet the requirement, you can go ahead and add Emby media server channel on it.
How to Add Emby on Roku
Go to your Roku dashboard, click on the ‘Streaming Channels’ menu tab, scroll down and click on ‘Search Channels’ and enter ‘Emby’ into the search box. Next, click on the Emby channel icon and click ‘Add to Channel’. Once added, you can open it.
Emby is available on the Roku app store.
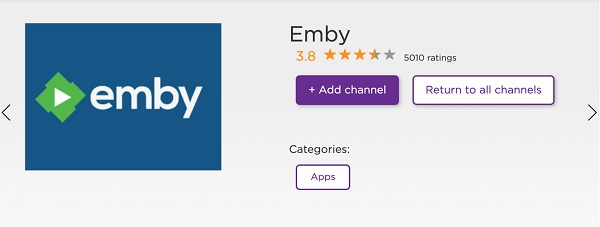
You can also add it directly from the Roku device interface.
To add it to your Roku device, follow the procedures below:
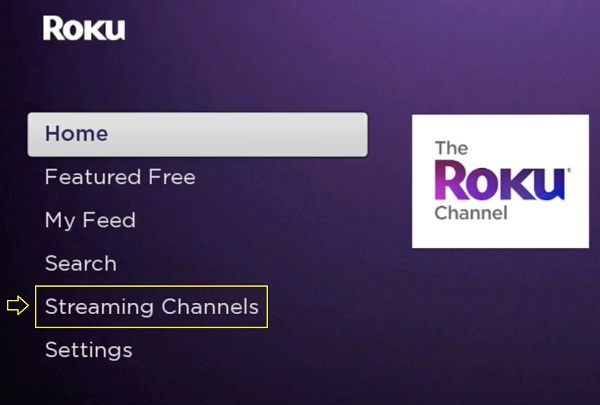
Step 1: From your Roku dashboard, scroll down to the ‘Streaming Channels’ menu tab
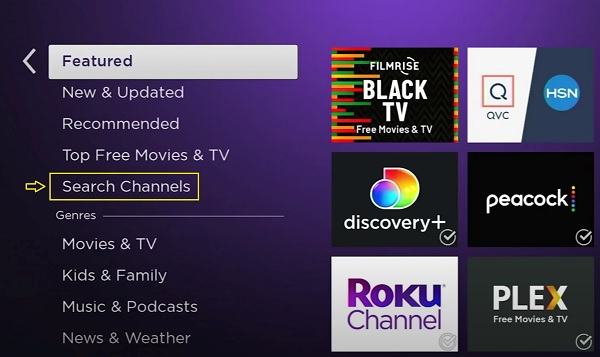
Step 2: Scroll down and click on ‘Search Channels’
Step 3: Search for ‘Emby’ by typing it into the search box. Then, click on the Emby channel icon that appears.
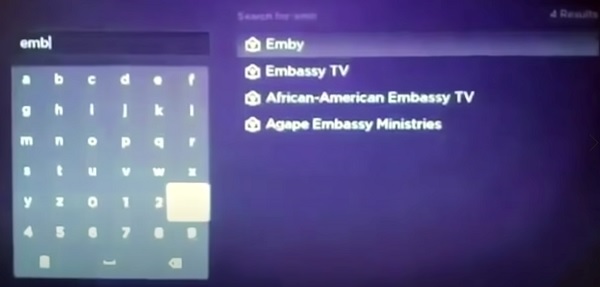
Step 4: Click on ‘Add channel’. Once added, click on ‘Go to Channel’.
Just like that, you have successfully added Emby on Roku. Now, you can go ahead to connect it.
How to Connect Emby on Roku
There are 3 ways to connect your Emby media server to TCL or Hisense Roku:
- Using Emby Connect
- Using scan network option
- Manually adding server
Now, let’s look at how to use each method start from the default – Emby Connect.
Method 1: Using Emby Connect
This is the default method when you open Emby on Roku for the first time. Also, you should have an account with Emby already.
You will be provided with a PIN.
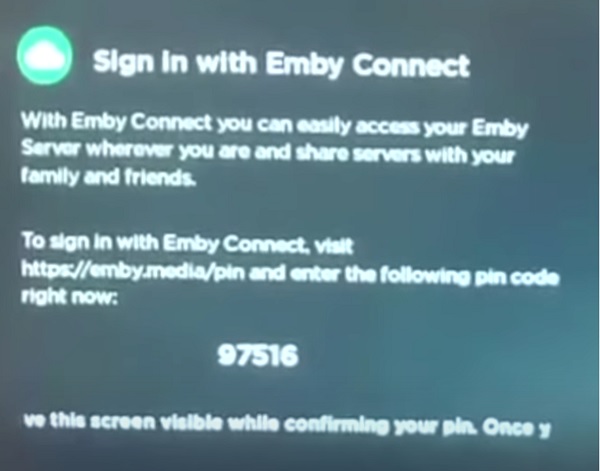
- Go ahead and visit https://emby.media/pin.html
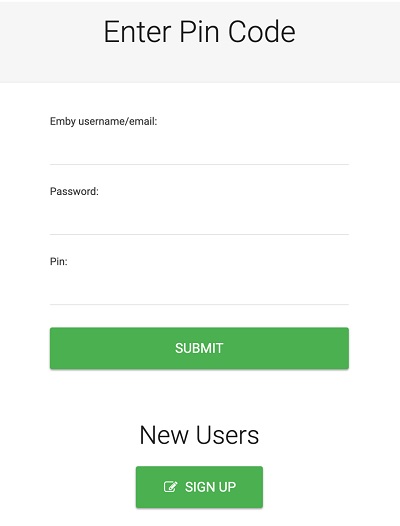
- Enter your Emby username/email, password and PIN shown earlier on the page.
If the details are enter correctly, you will see a message showing “Pin Confirmed. Thank you“, and you will be connected to the server. Also, this will be saved automatically and used as the default connection method every time you open Emby on Roku.
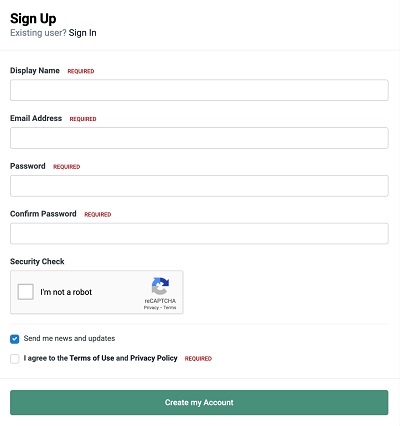
If you don’t have an account yet, click on the Sign Up icon on the page to create a new account.
Method 2: Using Scan Network Option
In this method, you should ensure that your Roku and Emby server are connected to the same network to ensure network connectivity.
Once that is ensured, click on ‘Skip (Connect to Server Manually)‘ when you open Emby.
Your Roku device will automatically detect your Emby server, then show the server and port.
Next, choose the Display Name for the server and click OK.
Finally, click on Connect.
On the next page, you will be required to authenticate the connection by signing in to your Emby account.
Once authenticated, you are good to go!
Method 3: Manually Adding Server
If you used the second method (scan network option) and the server shown is not the one you intend to connect or you are unable to connect using the scan (probably due to firewall issue), then this method is suitable for you.
To use this method, click on ‘Skip (Connect to Server Manually)‘ when you open Emby.
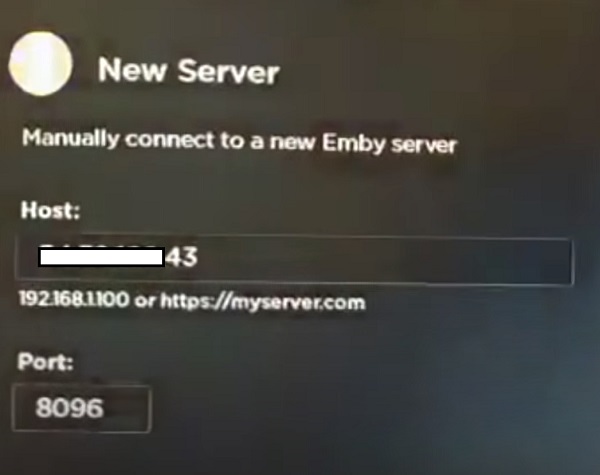
Next, click on Change Host. Enter the IP Address or host name of the EMBY server and choose OK.
The default Port is 8096. You can find it on the Emby server under Configuration > Advanced > Hosting > Local http port number.
Finally, click on Connect.
Once connected, you should see a list of users. Click on any of the users to sign in as. Otherwise, you can click on Manual Login.
Then, go ahead and enter the username and password to sign in.
Once the authentication is successful, you will be shown the Roku client homepage.
Emby Not Working on Roku
If you can’t connect your Emby server to Roku or you see errors like ‘No Server found’ or ‘Unable to Connect’, it can be due to a number of thinsg from incorrect IP/hostname, firewall issue, error on the configured HTTP server port to wrong TCP port.
First thing you should do is check your Roku IP from Roku > Settings> Network> ‘Your Network Type’
Also, turn off firewalls temporarily to make sure there is no issue with the firewall.
Although, it’s not so likely, you should also confirm that your TCP port has not been changed from the default value: 8096.
Also, try to connect via PIN using Emby Connect if the manual scan is not working.
Alternative Media Server Channels
An alternative to Emby on a Roku device is Plex. You can also use Kodi. However, since there is no official app for Kodi on Roku yet, the only way to use Kodi on Roku will be by casting from supported devices like your Windows/Mac PC.
Bottom Line
Emby is a one of the best media server designed to organize, play, and stream audio and video to a variety of devices.

One of the things I personally like about it is the server transcoding feature which allows it to handle a wide range of media files.
It has a very nice and easy to use interface on Roku devices.
That is all for now on Emby Roku. If you have any question, feel free to use the comment section below. Also, kindly share the content with others by using the share buttons below.
