Are you looking to stream your favorite channel only to see the “No Signal” message on your Roku TV? Then, you are on the right page.
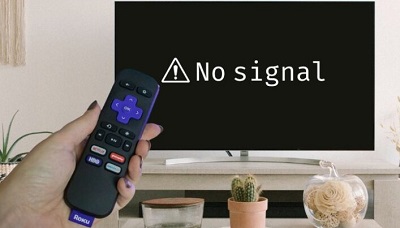
In this guide, I’ll be sharing some handy troubleshooting tips to help resolve the Roku TV “No Signal” issue.
You will see what causes this issue, explore various potential solutions, and get back to watching your TV in no time!
Without any further ado, let’s dive right in!
Roku No Signal: Causes & Troubleshooting
Before we jump into troubleshooting the Roku “No Signal” issue, let’s quickly explore the possible reasons behind it.
So, why might this be happening?
- First, an incorrect input (source) selected on your TV can trigger this problem. Sometimes, while switching between devices, you can accidentally overlook this simple thing.
- Another common culprit is a faulty or improperly connected video cable, especially the HDMI cable. A loose connection or a damaged cable can prevent your Roku from communicating with your TV, leading to this error. Additionally, if the cable isn’t supported by your Roku TV, you might see the “No Signal” message on your screen.
- Power supply issues can also cause this problem. If your Roku device isn’t receiving adequate power, it won’t function properly, resulting in a lack of signal. So, let’s check if the power source is working fine.
- Occasionally, the problem lies with the TV itself. Technical glitches or outdated software issues can interfere with the signal reception, causing the issue.
Now that you have a good understanding of the potential causes, let’s delve into the troubleshooting steps and get your Roku TV up and running again.
1. Check the Power of your External Device
First things first, check the power of your external device.
Whether it’s a gaming console, a Roku stick, or any other streaming device, the first step in resolving the Roku “No Signal” issue is to make sure that the external device is turned on.
Sometimes, you might overlook the simplest things. It’s possible that your external device is turned off, which can result in a lack of signal being transmitted to your TV.
So, let’s make sure it’s powered up and ready to go!
To start with, locate the power button or switch on your device. Give it a quick press or flip it to the “on” position. Keep an eye out for any indication that the device is receiving power, such as a light turning on or a screen display appearing.
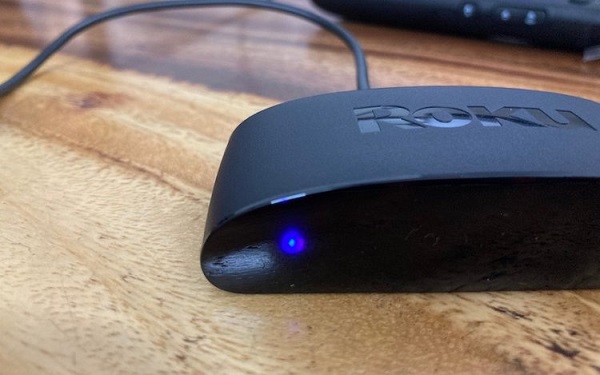
Additionally, you can also check if the device is plugged into a power source properly. Make sure that the power cord is securely connected to both the device and the power outlet.
Sometimes, a loose connection can lead to intermittent power supply and disrupt the signal transmission.
By double-checking and confirming that your external device is powered on, you eliminate the possibility of this simple oversight causing the Roku “No Signal” message.
2. Check your Roku TV Power Source and Adapter
Insufficient power supply is one of the main causes behind the Roku TV “No Signal” error.
That’s why it’s important to make sure that your TV is receiving enough power to have smooth signal transmission.
Take a look at the power source for your Roku TV.
Try using a different device or appliance on that power source to see if it’s giving out adequate electric power.
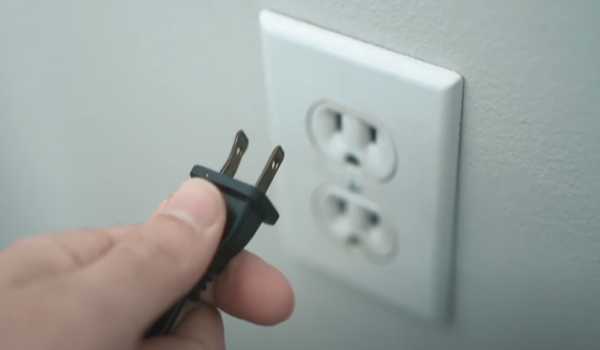
Next, focus on the power adapter.
Roku devices usually come with a USB power adapter that plugs into the power cord.
Make sure that the adapter is firmly connected to both the power cord and the Roku TV itself. Give it a gentle wiggle to ensure there are no loose connections that could stop the power supply.
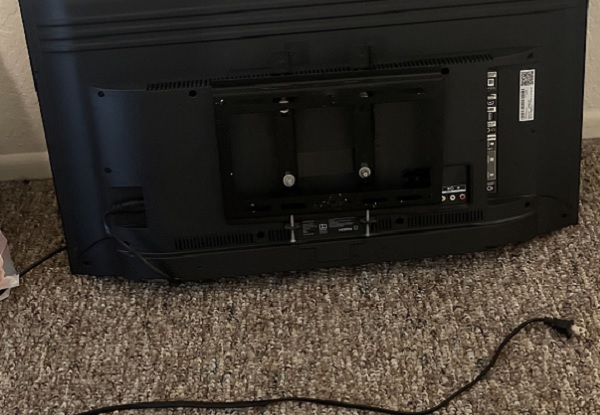
To verify if the power source and adapter are functioning properly, look for any signs of damage. Make sure the wall socket and the power cord are free of damage and wear.
Additionally, consider using a different power outlet or swapping the power cord and adapter with a known working one, if available. This will help rule out any hidden issues with the specific power source or adapter being used.
By ensuring that your Roku TV is receiving sufficient power, you eliminate any potential power-related causes of this dreaded problem.
3. Power Cycle your Roku Smart TV
If there is no power issue related to your external device or TV, then you should go for power cycling your TV, as it can work wonders in resolving such issues.
Sometimes the TV’s internal settings may get stuck or corrupted, causing signal issues.
Power cycling can reset these settings and potentially resolve the HDMI “No Signal” problem on your Roku TV.
To power cycle your Roku Smart TV, follow these simple steps:
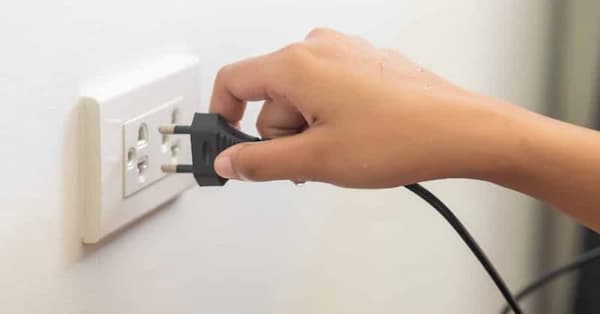
- While your Roku Smart TV displays the “No Signal” error message, locate the power cord at the back of your TV and unplug it from the electrical outlet. This step ensures that the TV is completely disconnected from the power source.
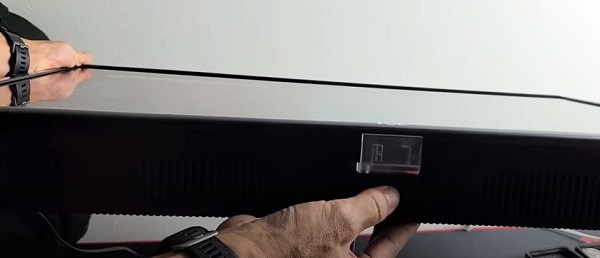
- With the power cord unplugged, locate the power button on the TV itself. Press and hold the power button for about 30 seconds. This lets your TV discharge any remaining power and helps reset its main board.
- After 30 seconds, plug the power cord back into the electrical outlet. Make sure it’s securely connected.
- Now, press the power button on your TV or use the remote to turn it on. Observe the screen to see if the “No Signal” error message persists.
By power cycling your Roku Smart TV, you give it a fresh start and a chance to resolve any temporary issues that may be causing the signal problem.
So, give it a go and see if this simple step gets your TV back up and running smoothly again!
4. Select the Right Input Source
Choosing the right input source helps ensure that your TV is tuned to the correct channel where your external device is connected.
By cycling through the inputs, you can find the one that corresponds to your device, allowing the signal to flow smoothly.
To find the right input source, follow these steps:
- Firstly, disconnect all the external devices from your TV (sound bars, console, streaming stick)
- Take your TV remote, and locate the “Home” button. It’s often represented by an icon like a rectangle with an arrow pointing into it.
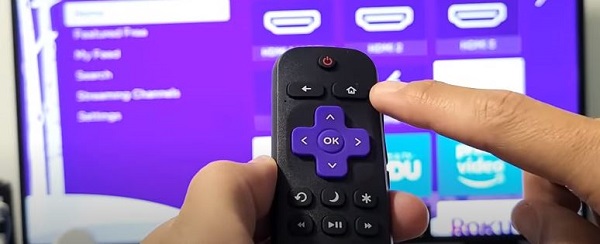
- Press the Home button to bring up the home screen and go to the Settings menu.
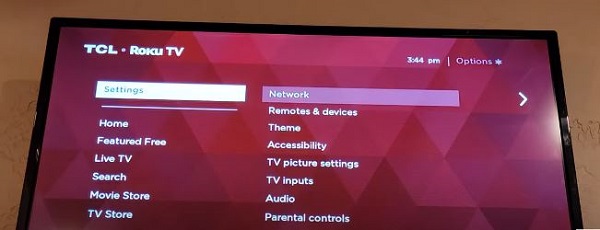
- Press the “TV Inputs” option. Now, it’s time to go through the inputs. Press the arrow buttons to navigate through the options. Keep an eye out for names like “HDMI 1,” “HDMI 2,” or “AV.” These are the likely candidates where your external device might be connected.
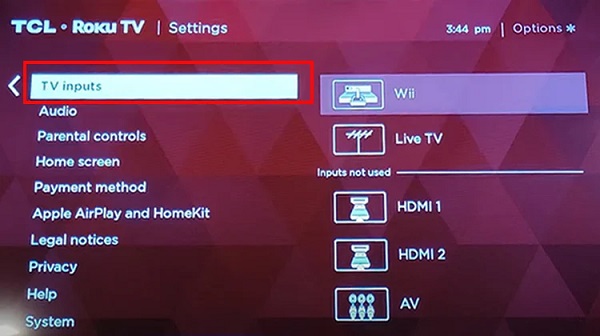
- As you go through the inputs, watch the TV screen closely. Look for any visual signs that indicate a signal is being received.
- Once you’ve identified the correct input source, simply stop searching. Your external device should now be detected by the TV, and you can enjoy uninterrupted streaming once again.
Remember, it’s an easy mistake to have the TV set to the wrong input, especially if you have multiple devices connected.
So whether you have a Hisense, TCL, Sharp, or Onn Roku TV, this step is a must-try if you see the “No Signal” message on connecting an HDMI or external cable.
5. Check and Clean your HDMI Ports
Another thing to consider when you get the Roku “No Signal” on HDMI cables is to clean the HDMI port and cable pins!
Over time, dust, dirt, or even oxidation can accumulate on the HDMI port and cable pins, causing a weak or unstable connection.
Cleaning them ensures a snug and reliable connection, enabling the signal to flow smoothly.
To rule out this possibility, follow these steps to check and clean your TV HDMI port and cable pins:
- First, make sure that both your external device and TV are turned off. This step ensures safety and prevents any accidental damage.
- Locate the HDMI port on your TV. It’s usually labeled as “HDMI” and may have a corresponding number, such as HDMI 1 or HDMI 2.
- Inspect the HDMI port for any visible dust, dirt, or debris. If you notice any, gently blow into the port or use a can of compressed air to remove the unwanted particles. Be careful not to use excessive force or any sharp objects that could damage the port.
- Now, let’s move on to the HDMI cable pins. Carefully examine both ends of the cable for any debris. If you spot any, take a soft cloth and gently wipe the pins to clean them. Avoid using liquids or harsh cleaning agents.
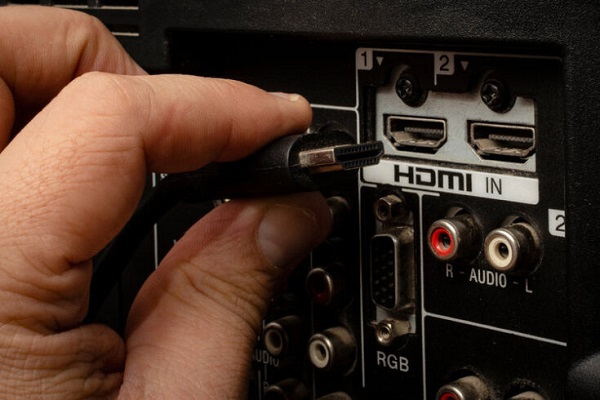
- Once you’ve cleaned the HDMI port and cable pins, carefully plug the cable back into the port. Make sure that it fits perfectly.
- Power on both your external device and TV, and check if the “No Signal” issue persists. With the HDMI port and cable pins clean, there’s a good chance that your device will now communicate flawlessly with your TV.
6. Use a Different HDMI Port and Cable
It’s possible that the HDMI port you’re currently using on your TV is malfunctioning.
A faulty HDMI cable, whether it’s due to physical damage or internal issues, can also lead to a “No Signal” error on HDMI.
By trying different ports, you can determine if the issue lies with a specific port or not.
Follow these steps to try a different HDMI port and cable:
- Start by identifying the available HDMI ports on your TV. Take a close look at the back or side of your TV, and note the labels for each HDMI port, such as HDMI 1, HDMI 2, etc.
- Choose an alternative HDMI port on your TV that is currently not in use. If you have multiple HDMI ports available, try starting with the next available one in sequence. Remember, this is a trial-and-error method.
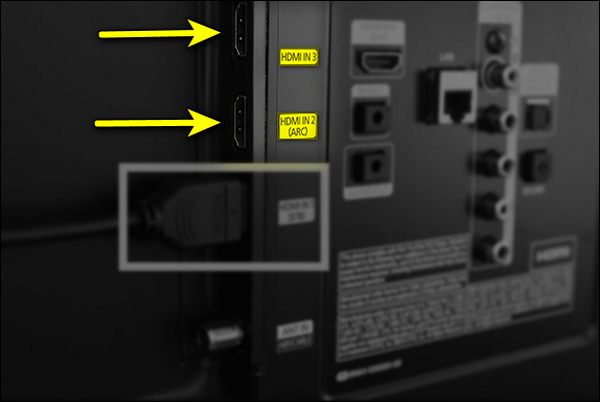
- Unplug the HDMI cable from the current port and plug it into the newly chosen port. Ensure a secure connection.
- If you’re still encountering the “No Signal” issue on your Roku Smart TV after switching ports, it’s time to address the HDMI cable. Replace the current HDMI cable with a different one that you know is functioning properly. Make sure it’s compatible with your device and the TV.
- Power on both your Roku and TV and see if the “No Signal” problem persists.
By using different HDMI ports and cables, you’ll be able to identify any issues and find a combination that provides a successful signal transmission.
7. Update your Roku OS Firmware
Outdated firmware can sometimes cause compatibility issues with your TV or disrupt the signal transmission.
Firmware updates often come with performance enhancements that optimize the Roku device’s functionality, including signal transmission.
Keeping your Roku OS firmware up to date can greatly help in resolving the Roku TV “No Signal” HDMI error.
Here is how you can update your Roku OS firmware:
- Firstly, disconnect all the external devices
- Grab your Roku remote and press the Home button. This will take you to the Roku home screen.

- Using the navigation buttons on the remote, move the highlight to the left side of the screen to access the sidebar menu. Select “Settings” and press the OK button.
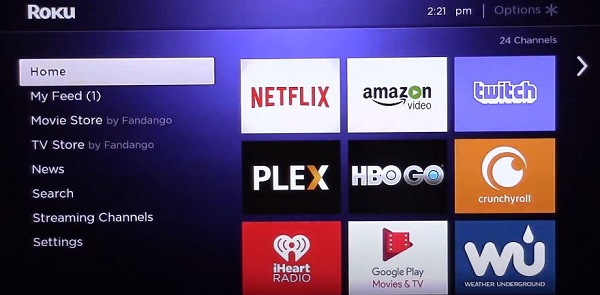
- Within the Settings menu, navigate to “System” using the remote’s navigation buttons. Press the OK button to enter the System settings.
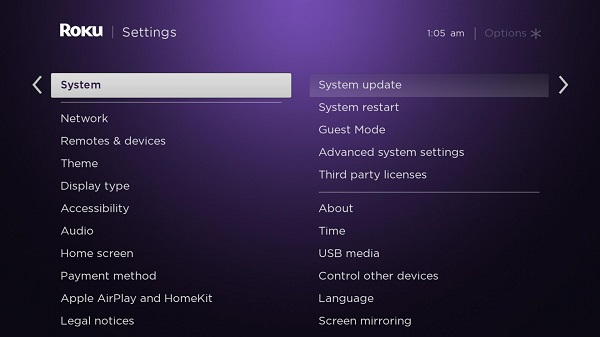
- Inside the System settings, select “System Update” and click on “Check Now.” Your Roku Smart TV will now check for any available Roku OS updates.
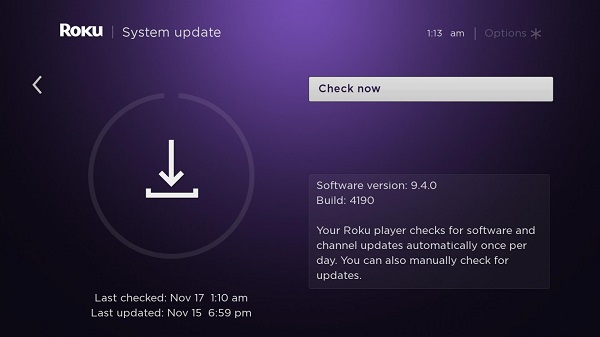
- If an update is found, follow the on-screen instructions to download and install it.
- Once the update is completed, your TV will restart. Now reconnect your external streaming or gaming device and see if the issue is still there.
8. Factory Reset your Roku TV
If all else fails and you’re still getting the Roku TV “No Signal” error message on your screen, it might be time to consider performing a factory reset on your Roku TV.
A factory reset restores your Roku TV to its original settings, wiping out any software issues that might be causing the “No Signal” problem.
By resetting your Roku TV to factory settings, you eliminate any potential misconfigurations or settings that might have been slowing down the signal transmission.
Here are the detailed steps for factory resetting your Roku TV:
- Firstly, disconnect all the external devices from your TV.
- Using your Roku remote, press the Home button to go to the home screen.
- Navigate to “Settings” using the navigation buttons on the remote and press the OK button.
- Within the Settings menu, select “System” and press the Enter/Ok button on the remote.
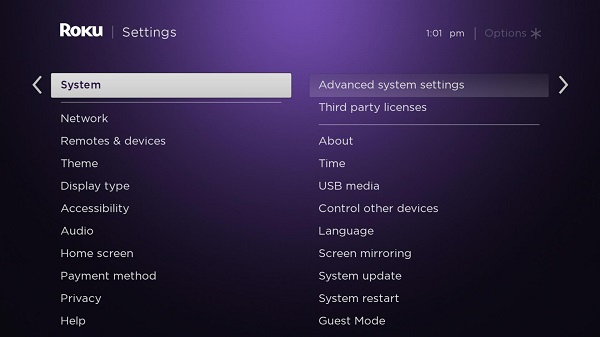
- Choose “Advanced system settings.“
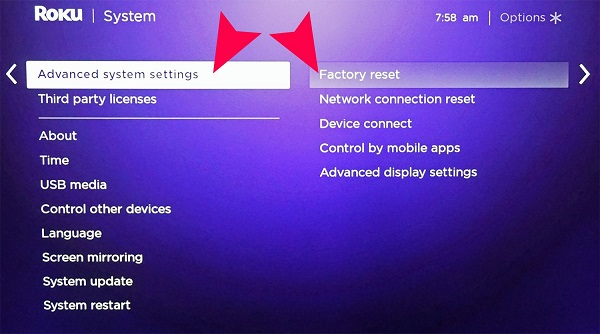
- Finally, select “Factory reset” and press OK.
- You’ll be prompted with a warning message stating that this action will delete all user data and settings. Confirm your selection and the factory reset process will begin, and your Roku TV will restart.
After the factory reset is complete, you’ll need to set up your Roku TV again, including signing in to your Roku account and reinstalling your channels.
If troubleshooting the Roku “No Signal” with a factory reset doesn’t resolve the issue, it may be worth considering reaching out to Roku customer support for further assistance.
9. Contact Roku Support
The last thing you can do when you’re consistently getting the “No Signal” issue on your Roku TV is to contact Roku’s customer support service.
Roku support professionals are trained to troubleshoot complex issues specific to Roku devices.
They can provide you with tailored solutions based on your unique situation.
To get in touch with Roku support, you can try the following methods:
- Visit their website: Go to the official Roku support website.
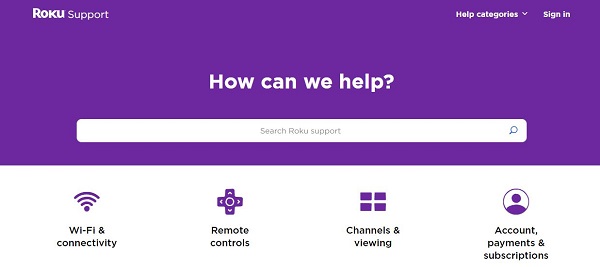
- Email support: If you prefer written communication, you can reach out to Roku support via email here. Send your query or issue to them, and their support team will respond as soon as possible.
- Phone support: For more immediate assistance, you can contact Roku’s customer support by phone. Dial 1-816-272-8106 to speak with a representative directly.
Remember to provide them with relevant details about your issue, such as the specific model of your Roku device, the steps you’ve already taken to troubleshoot, and any error messages you’ve encountered.
This will help them better understand and address your situation.
The Bottom Line
In conclusion, troubleshooting the Roku “No Signal” issue requires a systematic approach to identify and resolve potential causes.
By following the steps outlined in this blog post, you can significantly increase your chances of restoring a smooth and uninterrupted streaming experience.
If all else fails, don’t hesitate to reach out to Roku support via their website, email, or phone for further assistance.
If you found this guide helpful, let me know which of the methods helped you resolve the issue in the comment section below.
