If you are facing an issue where one AirPod is louder than the other, then you are not alone.
This is a common problem that a number of Apple AirPod users have faced (and still continue to face).
The good news?
I am going to show you how to fix the issue quickly here on this page without spending a dime! It doesn’t matter whether it’s the left or right AirPod that’s louder (or quieter).
Just so you know, it is very unlikely that there is an hardware issue with your AirPod if one AirPod is louder than the other. Rather, it’s most likely just a simple dirt issue.
Don’t believe it? Well, the result in the next few minutes will convince you.
First, let’s look at the reason why one of your AirPods is louder than the other. Then, we look at how to fix it.
Why is One AirPod Louder than the Other?
When one AirPod is louder than the other, it is usually due to dirt or earwax clogged up in the speaker of the quieter AirPod, dirt in the charging case which affects charging, disparity in audio balance settings, dirty/faulty AirPod tip, and less commonly faulty hardware issue.
I will show you how to deal with each and every one of these causes, starting from the most likely one (with the highest success rate) to the less common ones.
I can tell you one thing for sure.
Most of the time, people who have had the issue where one one AirPod is louder than the other were able to fix it just by cleaning the AirPod the right way, cleaning the charging case or by changing the tip of the AirPod (all of which I will show you how to do in this guide).
Trust me, it’s as simple as it sounds, there is most likely nothing wrong with your AirPod (hardware or software) and you probably don’t need to get a new one.
So, without any further ado, let’s get into the main thing.
How to Fix One AirPod Louder than the Other
If one AirPod is louder than the other, you can fix it by cleaning the less audible AirPod with a cotton swab or Q-tip, removing any dirt inside the case, sucking the AirPod to remove earwax, adjusting the audio balance slider, replacing the AirPod tip and reseting the AirPod.
1. Clean the AirPod
The most common reason why one of the AirPods is quiet is because of dirt or earwax lodged on the speaker.
What you want to do is get a cotton swab or Q-tip and isopropyl alcohol to clean it up.
To do that:
- First, get a Q-tip and cut it in half.
- Use the cut end of the Q-tip and rub it gently against the speaker on your quieter AirPod (most especially the biggest/front speaker) to dislodge any dirt that’s on it.
- After that, use the cotton side of the Q-tip to also clean it. You can also use a bit of isopropyl alcohol with the Q-tip to clean up the dirt. (Caution: Don’t soak the Q-tip with alcohol, just wet it a bit with it)
- Once done, clean it again with dry Q-tip and allow it to dry.
If done properly, that should remove any dirt/earwax that is fixed on the speaker, blocking the sound from coming out properly.
A lot of users have been able to get their quiet AirPod to start working and loud as new by doing this just once!
If it works for you in just one try, great! Otherwise, don’t give up yet.
You might have to clean it more than once before it works. So, go ahead and try another cleaning cycle.
Some other users had to try it as much as 5 times before it was finally clear and the quieter AirPod started working again.
If after going through multiple cleaning cycle (depending on how well you do it) and you are still not getting loud audio on one of your AirPods, then try the next proven method below.
2. Blow into the Charging Case (& Charge Again)
Cleaning the inside of your charging case is another way to fix the issue with AirPods loudness.
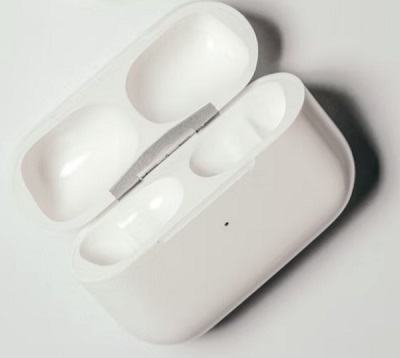
If you are wondering how cleaning your charging case can affect the loudness of your AirPod, it’s quite simple.
Your iPhone may show that both of your AirPods are charging, when it fact, only one of them is charging.
When that happens, the AirPod that hasn’t been charging will become very low or even stop working completely until it’s properly charged.
What causes this is when dirt is inside your AirPod charging case, your phone may still detect contact when the AirPods are plugged into the case and hence show that both are charging. However, the contact might actually not be very minimal due to dirt in the port which prevents a good connection needed to charge properly.
What you want to do is to make sure your AirPods actually charge.
To do this:
- Blow into your AirPod charging case (the one that is quieter) to remove any dirt that is stuck on the charging port. You can also use cotton swab to clean it.
- Once done, go ahead and plug back your AirPod into the case for a few minutes to charge.
After that, use your AirPod and the issue should be fixed by now.
Now, both of your AirPods should be loud and clear by now. Otherwise, try the next method to fix it.
3. Suck the AirPod that’s Lower in Volume
I know it sounds ridiculous, but believe me when I say that sucking the AirPod till you feel air coming through can help you fix the issue immediately.
A lot of AirPod users have been able to get their AirPods loud and clear by sucking it. You can also try to blow through it, but that will only mean blowing the dirt into the Pods.
While cleaning with Q-tip or cotton swab can also do the job, nothing does the job of removing the earwax better than sucking it (especially since some of the dirt can easily be stuck within the mesh of the speaker).
You might have noticed that only the side/back speaker of one of your AirPods is actually working (making it louder on the outside), while the front (biggest speaker) on the AirPod doesn’t work.
This happens when the dirt is stuck on the front speaker while the other smaller speakers are clear.
The video below will also show you how to go about it.
By now, the issue should be fixed for sure and both AirPods should be loud and clear.
Otherwise, the next thing is to check if you haven’t messed up with the L-R audio balance on your iPhone.
4. Check & Adjust the Audio Balance Slider
There is an audio balance settings on your phone that you can use to adjust the loudness of your AirPods.
By adjusting the balance, you can choose whether both AirPods should be of the same loudness or otherwise, which of the sides of the AirPods (left or right) should be louder and to what extent.
What you want to do is to check this to make sure that you have set both AirPods at equal volume level.
Here’s how to check:
On iOS 13:
Go to Settings > Accessibility
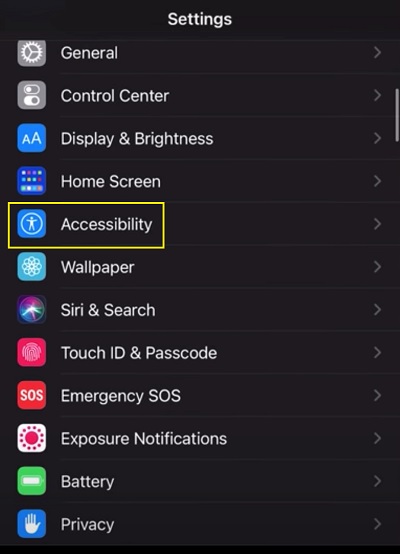
Under Hearing, click on Audio/Visual
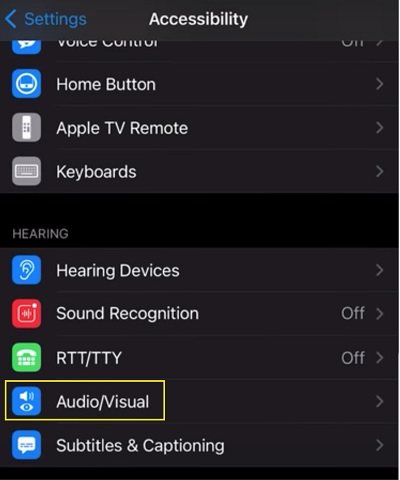
Check the Audio balance slider, if tilted to one side, adjust it to the center.
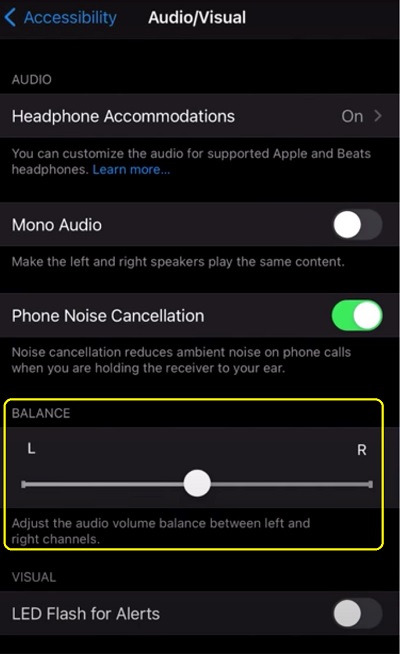
On iOS 12 (or older):
If you are using iO2 12 or older versions, go to Settings > General > Accessibility > Hearing
There, you will also find the Audio balance slider.
By adjusting the audio balance slider, the issue will be fixed immediately.
If the slider was already at the center when you checked, then proceed to the next tip.
5. Clean/Change the Tip of the AirPod Pro
A number of AirPod Pro users have been able to fix the issue where one AirPod is louder than the other simply by cleaning or changing the tip of the AirPod Pro.
To do this, remove the tip of the AirPod and clean it first with a dry cloth.
Once done, put it back in and check if it works.
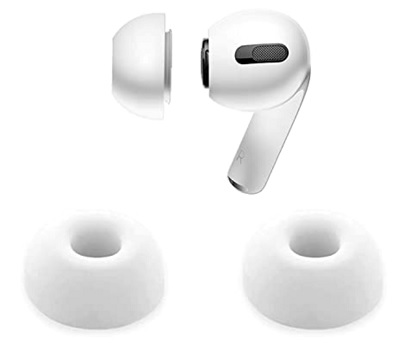
If it doesn’t work, you might have to change the tip of the AirPod Pro.
However, before you go ahead and do that, check out the other tips below that don’t cost you a dime.
6. Reconnect the AirPod
As simple as it sounds, doing this can fix the issue immediately.
- First, disconnect your AirPod from your device (iPhone or Mac).
- Then, remove the AirPods and plug back into the case.
- Next, go ahead and reconnect the AirPods and check if it fixes the issue.
This simple reconnection should fix the issue at this point.
If you are unlucky with this method, the next thing is to go ahead and reset your AirPod.
7. Re-pair your AirPods
If reconnecting your AirPods as explained earlier doesn’t fix your issue, the next thing is to actually re-pair your AirPods to your iPhone.
Here’s how to do that:
- First, make sure your AirPods are in the case, then close the lid for at least 30 seconds.
- Next, open the lid of your AirPods case and set it to the side.
- Go to your iPhones, go to Settings > Bluetooth.
- Look for your AirPod under ‘My devices’ and click on the ‘info’ icon in front of it.
- At the bottom of the page, click on ‘Forget this device‘.
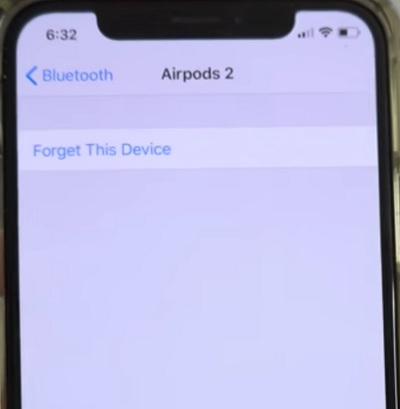
- Now, hold down the setup button at the back of your AirPod case until the blinking white light between the AirPods start flashing amber colour (NOTE: you are doing this while the lid is still open)
- Finally, follow the instructions displayed on your iPhone screen to setup your AirPods again.
Once you have set it up again, check if one AirPod is still louder than the other when listening to music or watching videos.
If it does fix it for you, yay!
Otherwise, you need to check at this point if the issue is with your AirPod or rather if it’s coming from your device.
Now, let’s take a look at how to do that.
8. Use the AirPod with another device
Like I said, you need to be sure at this point if the issue is from your AirPod or rather your device.
To check this, disconnect your AirPod from your device and connect it to another device.
If the issue persists, then the problem is with your AirPod.
In that case, make sure you have followed all the earlier stated tips that are specific to troubleshooting the AirPod.
However, if both AirPods work perfectly well on the other device, do one final check by connecting again to your own device. If the issue occurs again when connected to your device, then you know for sure it’s from your device and not the AirPod.
In that case, the next 2 tips below will get that fixed for you in no time!
9. Restart your iPhone/Mac
It’s quite amazing what something as simple as a restart/reboot can do when it comes to fixing software issues.
I have mentioned earlier that if one of your AirPods is louder than the other, it’s most likely an issue with your AirPod and not your device.
However, if you have done all I have explained above and the issue still persists, it’s now worth looking at the software aspect (especially if your AirPods work perfectly well when you connect to another device as explained in the previous section).
So, simply disconnect your AirPod from your device and reboot your iPhone or Mac. Once rebooted, go ahead and connect back to your AirPod. That should fix the issue with one AirPod being louder than the other. Otherwise, let’s a step further in the software fix.
10. Update Your Device OS
Another thing to check as related to software is the version of your OS.
You want to make sure that your iOS device is up to date.
To do that, go to Settings > General. Then, click on Software Update.
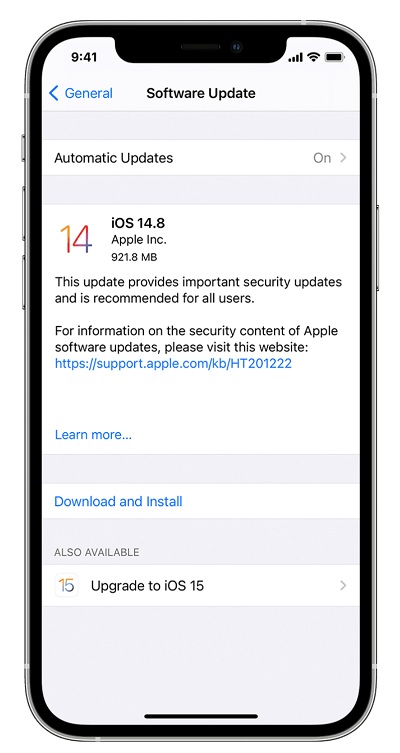
If there is an available update, download it and then install it.
If all of these do not fix the issue, then the AirPod is likely damaged and needs to be fixed or replaced.
11. Contact Apple for a Fix/Replacement
If you have been using it for less than a year (which means you are still covered by warranty) and all the fixes above didn’t fix the issue, go ahead and contact Apple support to fix or replace your AirPod for you at no cost!
However, you should know that they warranty does not cover damage caused by accidents or unauthorized modifications.
Bottom Line
One side of your AirPods (and AirPods Pro) can be louder that the other for a number of reasons stated earlier.
However, you can fix any of these issues by following all the proven fixes explained above, which are also highlighted below:
- Clean the AirPod
- Blow into the charging case to remove dirt, and charge again
- Suck the AirPod that’s quieter to remove ingrained earwax
- Adjust the audio balance slider
- Clean or replace the tip of the AirPod
- Reconnect the AirPod
- Reset the AirPod
- Check if the AirPod works with other devices
- Restart your iPhone/Mac
- Update device iOS
Now, it’s your turn.
Which of these troubleshooting helped you fix the issue where one of your AirPods is louder than the other? Share your experience and feedback by using the comment section below.
Also, kindly share the content with others by using the share buttons.

I watched your Youtube video, tried your suggestions cleaning/blowing & sucking….they work like their brand new on my first try. Thank you.
You are welcome.