If your Hisense Roku TV is not connecting to your WiFi, there are a number of proven ways to fix it. You might even have an excellent network connection signal which other devices actually connect to, but your TV just won’t connect.
Even more, your TV could might actually connect to your phone hotspot or any other network other than the home network you actually use.
There are two common scenarios:
- Your Hisense Roku TV disconnected from your WiFi network after a restart or while watching TV, and it won’t connect back even when it shows an excellent network connection.
- You have an old or new Hisense Roku TV, you are trying to connect to a new network or reset network, you enter the correct password, but it won’t connect. In the case of a new TV, it’s probably not even showing a list of available network to connect to in the first place.
In this guide, I am going to show you 12 proven ways to fix an Hisense Roku TV that is not connecting to WiFi quick.
Whichever method works for you will depend on what is the cause in your own case and the scenario you are in.
Without any further ado, let’s dive right in!
Hisense Roku TV Not Connecting to WiFi
If your Hisense Roku TV is not connecting to WiFi, follow the step-by-step troubleshooting guide to fix it.
1. Power Cycle Your TV
You can fix your Hisense Roku TV that won’t connect to WiFi by power cycling it.
This is also known as a soft reset (don’t worry, it won’t delete any of your installed channels or your settings).
Here’s how to do power cycle your Hisense Roku TV:
- While your TV is on, unplug it directly from the power outlet
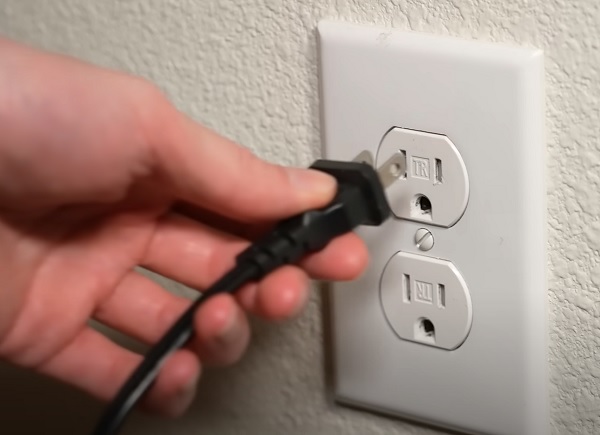
- Leave it unplugged for 30 seconds
- Finally, plug it back in and turn it on
- Check if the TV now connects to WiFi
If that fixes the issue and your Hisense Roku TV now connects to WiFi, great! Otherwise, move on to the next step.
2. Power Cycle Your Network Router
The next thing you want to do is to power cycle your network router. It doesn’t matter if your network router has an excellent signal and all other devices except your Hisense Roku TV connects to it.
Power cycling it can fix network issues like this anyway. When you do this, the network router will send a fresh network IP address for your Hisense Roku TV which might just fix the connection issue.
Here’s how to power cycle your network router:
- Turn off your network router and unplug it from the power source.
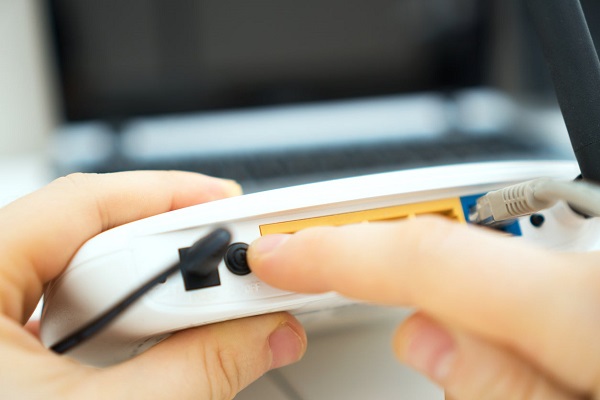
- Wait for 30 seconds and plug it back into the power source.
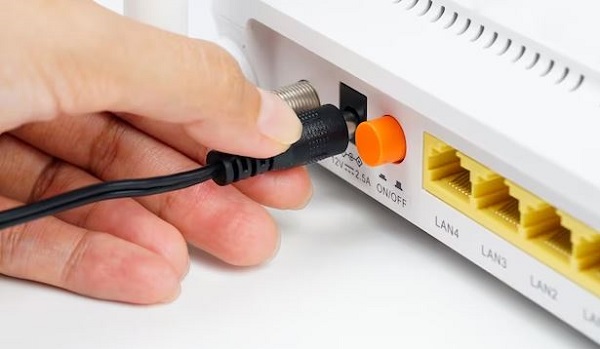
- Next, turn it on and allow up to 2 minutes for the router to be online.
- Once online, restart your TV and connect it to your WiFi network.
Now, your Hisense Roku TV should connect to your WiFi network. If not, try the next method.
3. Disable Network Pings from Secret TV Menu
Roku TVs have a secret system operations menu where you can do a lot of things that aren’t accessible in normal settings menu.
In this case, you need to do two things to fix the network connection issue:
- Access the Roku TV system operations menu and disable network pings
- Clear your Hisense Roku TV cache and restart it
I will show you how to do both of these in a few seconds.
First, what exactly is this network ping and why does it actually work?
A ping (Packet Internet or Inter-Network Groper) is a basic internet program that allows a user or device to test and verify if a particular destination IP address exists and is reachable.
If your Roku TV pings the W-Fi network and for whatever reason, it is “unreachable”, then your TV might not connect to the WiFi.
By disabling this, you are essentially skipping the “check” which is not in any way necessary for the WiFi network to work anyway.
Now, let’s take a look at this 2-step process fix.
A. Disable Network Ping:
To disable the network pings, you need to press a combination of keys on your Hisense Roku TV remote which will bring up the secret menu. If you don’t have one, you can get a replacement.
- First, make sure your TV is on and is on the home dashboard
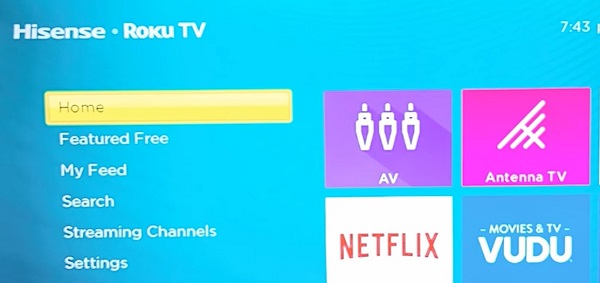
- Using the remote, press the ‘Home’ button 5 times
- Press ‘Fast forward’ button once
- Press the ‘Play’ button once
- Press the ‘Rewind’ button once
- Press the ‘Play’ button once again
- Then, press the ‘Fast forward’ button once again
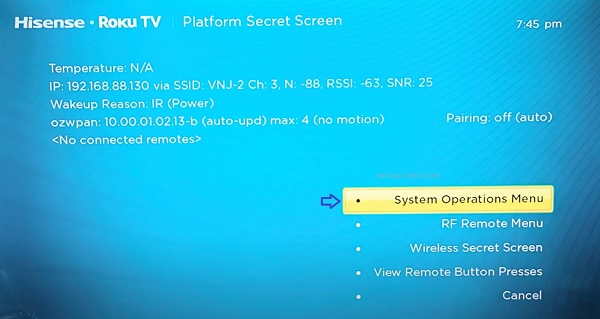
- Now, your TV should show the platform secret screen, select ‘System Operations Menu’
- On the next screen, select ‘Disable network pings’
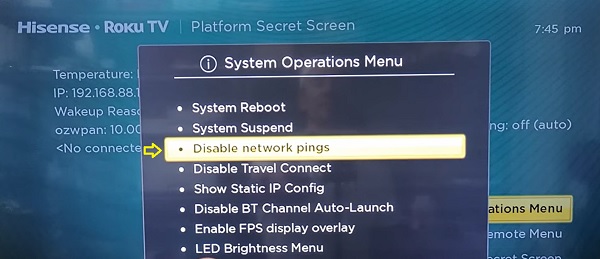
Once it is disabled, it should be showing ‘Enable network ping’, make sure it is left that way (don’t click it again).
- Now, press the ‘Home’ button to return to the home menu.
That’s not all, there’s one more thing left to do – clear the Hisense Roku TV cache and restart it.
B. Clear Hisense Roku TV Cache & Restart:
To do that, there’s another special key combination you need to press on the remote while on the home dashboard which will clear the cache and restart your TV automatically.
Here’s the key combination to clear your Hisense Roku TV and restart it:
- Press the ‘Home’ button on your Roku TV remote 5 times
- Next, press the ‘Up arrow’ ⬆️ button on your remote once
- After that, press the ‘Rewind’ ⏪ button twice
- Then, press the ‘Fast forward’⏩ button. twice
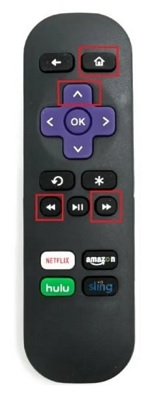
Once your Hisense Roku TV is back on, go ahead and try it again. It should connect to the WiFi now. In fact, a lot of you reading this must be good to go by now. For others who are still having the same issue, try the next method.
4. Do a Network Connection Check
You need to check the status and signal strength of the internet connection on your Hisense Roku TV. If the connection check is successful, it will most likely connect to the WiFi after the check. Otherwise, I will show you what to do next.
- To do a network check, go to Settings > Network > About, and see if it’s showing ‘Connected’ or not.
- On the same page, you will find the signal strength, is it showing ‘Poor’, ‘Good’ or ‘Excellent’?
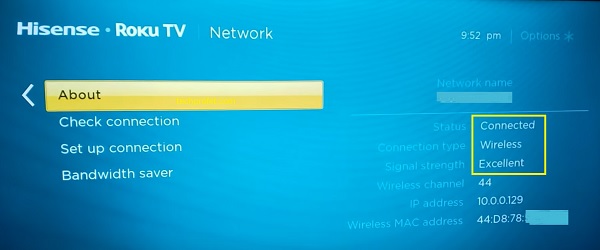
If the network is not connected or the signal strength is poor, this might be the reason why your Hisense Roku TV is not connecting to your WiFi.
- Finally, click on Check Connection.
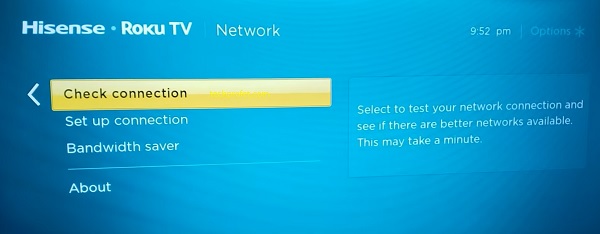
- You Roku device will start checking your Wireless/Wired connection and Internet connection.
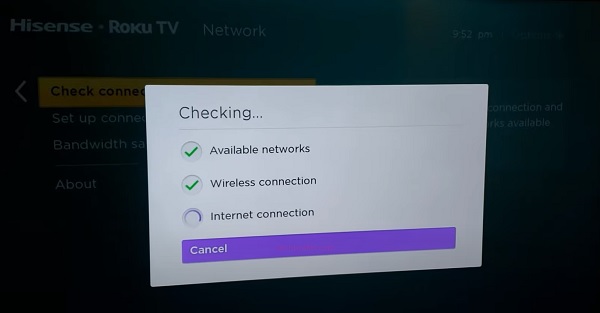
- Once the check is complete, you should see a prompt showing ‘Connection check was successful‘
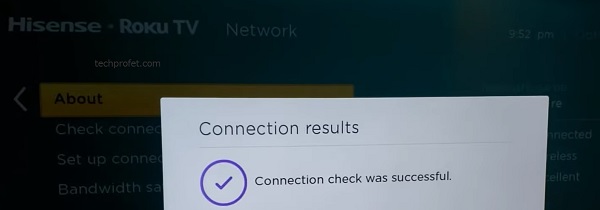
Now, check the WiFi network again and it should be connected automatically. Otherwise, you need to reset the network connection and try it again.
5. Reset Network Connection
If you have checked the network connection as shown above but your Hisense Roku TV is still not connecting to WiFi, then you need to reset the network connection. A network reset will disassociate the network access point and reset the Roku TV network driver.
In fact, if you contact Roku support, this is one of the first few things you will be instructed to do after power cycling your TV and router as I mentioned earlier.
Here’s how to reset your network connection on Hisense Roku TV:
- Press the settings (gear icon) on the remote.
- Under settings, select “System” > “Advanced System Settings” > “Network Connection Reset” and press the “OK” button.
- Your Hisense Roku TV should reboot after this.
- Once reboot is done, go ahead and connect to the WiFi network and it should now connect.
Since the network reset will forget all the network(s) you’ve connected to before, you need to update the network connection settings. Here’s how:
- Press Home button on Roku remote
- Scroll and select Settings
- Select Network
- Select Set up connection
- Choose Wireless
- Select your WiFi network from the list of available networks. If you do not see your network, select Scan again to see all networks.
- Enter your correct network password.
- Finally, select Connect
Now, you should be good to go.
6. Update Roku OS Software
If your Hisense Roku OS software is outdated and there is a pending software that needs to be downloaded and installed, you may notice various unusual behaviors on your TV and this is one of those. T
o fix this, you simply need to download and install the latest software version on your Roku TV.
However, since your Hisense Roku TV is not connecting to your WiFi network and you need internet for the software update, you have two options here:
- Connect to another network to do the software update (could even be your phone hotspot) if your TV connects to other WiFi networks
- Use the manual software update method
That said, here’s how to update your Hisense Roku TV OS software:
- Click on the Home button on your Roku device remote
- Select “Settings” > “System” > “System Update”
- Click on “Check Now” to manually check for any update
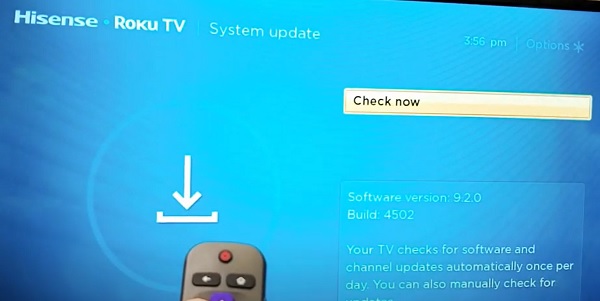
If there is any available software update, your Roku device will download it, install it automatically and then reboot once completed.
Once done, check if your Hisense Roku TV now connects to WiFi.
7. Update Network Router Firmware
Routers are one of the most neglected hardware devices. Once you set it up after purchase, it should continue to give you a stable internet connection on all your devices right? Well, that’s not always the case.
Just like TVs and streaming devices, routers also have firmware that could become outdated and hence, cause network connection issues.
If your Hisense Roku TV suddenly won’t connect to the same WiFi network you’ve been using it on for some day after a restart or hours after you had just used it, then it might be a case of outdated software on your router.
That said, you need to also update your network software firmware. To do that, you need to access your router dashboard through the gateway IP. From the dashboard, look around for software/firmware and update it to the latest version. Of course, the location of this will vary depending on your router provider.
This guide can help you update your router firmware if you are using popular providers like Asus, TP Link, Linksys, D-Link, NETGEAR and Belkin.
Once updated, try to connect your Hisense Roku TV to your WiFi network again and it should work. Otherwise, restart your router and TV first in case there are some caches files and try it again.
8. Configure/Switch Network Router Band
A lot of popular network router are capable of broadcasting two communication bands, usually 5 GHz and 2.4 GHz. If you are using such dual-band network router, then you have probably enabled the option to broadcast both bands.
According to Roku, some Roku devices are only capable of connecting with the wireless b/g/n networks on the 2.4 GHz spectrum. Although this is most commonly associated with the Roku Premiere and Express streaming devices, the same thing could be responsible for the WiFi connection issue on your Hisense Roku TV.
What you need to do is simple, but technical – you need to change the router settings for the 2.4 GHz band from g/n to b/g/n. If you don’t know how to do this, you can reach out to your router provider to help you with it.

Also, if you have a dual-band router but it only broadcasts the 2.4 GHz band, check your router dashboard and enable it to broadcast the 5.0 GHz band as well. Once enabled, try connecting your Hisense Roku TV to the 5.0 GHz band of the same WiFi network router and see if that connects successfully.
Again, if you don’t know how to enable the other network band on your dual-band router, you can reach out to the network provider to help you with that.
9. Reset TV to Factory Settings
If your Hisense Roku TV is still not connecting to WiFi, you can fix it by resetting it to factory settings. The only reason why I put it lower on the list is because you will be losing all your installed apps and configurations.
Now, here’s how to reset your Hisense Roku TV to fix the WiFi connection issue:
- Click on Home button on Roku remote
- Scroll and select Settings
- Select System > Advanced system settings > Factory reset
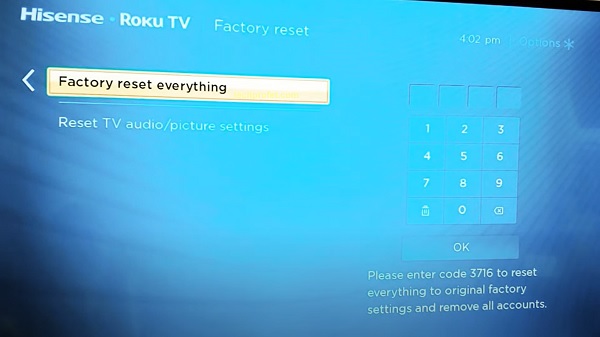
- Enter the code displayed on the TV and click on ‘OK’
Alternatively, you can reset your Hisense Roku TV without remote by using the physical reset button on the TV. Here’s how to do that:
- First, locate the physical reset button on your Hisense Roku TV. You will need a pin or any tiny object to push the button.
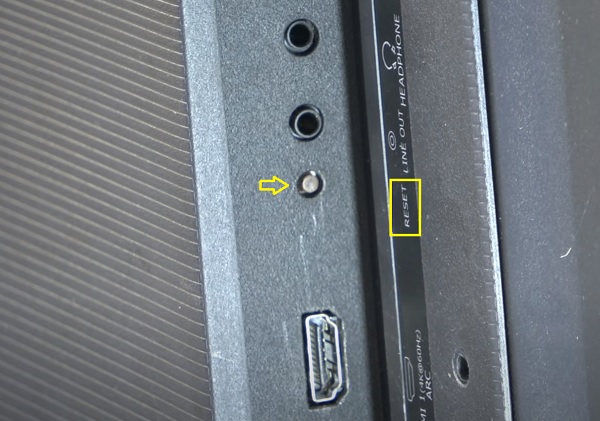
- Once you locate the reset button, press and hold the button firmly for 10 – 20 seconds while your device is powered on. When it shuts down, keep holding down the reset button until it powers on again and shows the Hisense Roku TV logo. Then, you can release the button.
- When the factory reset is complete, the TV will reboot twice and finally turn on.
Now, your Roku device will restart like a brand new one. During the setup, your Hisense Roku TV should now connect to the WiFi network.
10. Troubleshoot for Delayed Remote Response
Have you noticed any sort of laggy or slow response on your Hisense Roku TV with the remote? If yes, then you need to fix this. If not, jump to the next step.
You may be wondering, how does this even matter?
A user reported on Roku support page that this same issue was fixed once the batteries in the remote was changed with new ones. Although, this could have been some sort of coincidence, the TV was experiencing slow response with the remote before then.
If changing the battery truly fixed the issue, my guess is that when the “Connect” button was pressed while trying to connect the Hisense Roku TV to WiFi, there was either probably no input to the TV.
In that case, there are so many other ways to troubleshoot a Roku TV with slow response as shown in this guide.
Again, this might as well be a coincidence, but since it worked for someone who had the same issue, you should give it a try too.
11. Use Hardwire Connection
If your Hisense Roku TV is still not connecting to WiFi, then you should probably connect your Hisense Roku TV TV to your WiFi router using an ethernet cable. Moreover, ethernet cables are actually faster than WiFi connections.
Even better? You can use this method even if your Hisense Roku TV has no ethernet port (more on this soon).
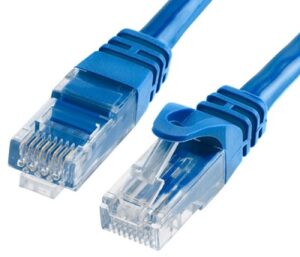
Here’s how to do this:
- Connect one end of an ethernet cable to your Hisense Roku TV and the other to an ethernet port on your WiFi router.
- Press Home button on Roku remote
- Scroll and select Settings
- Select Network
- Select Set up connection
- Choose Wired
- Your Roku device will automatically connect to your network and you are good to go.
If your Hisense Roku TV has no ethernet port, here’s how you can still connect via an ethernet cable:
- If your Roku TV does not come with an ethernet port, you can still use an ethernet cable by using a USB 2.0 ethernet adapter
- Plug the USB-to-ethernet adapter to the USB port on your Roku device, then plug the other end into your ethernet port on your router
- Next, reset your network connection as shown above (this will remove the current Wi-Fi connections)
- Restart your Roku device, and it will automatically be connected to the internet via ethernet
12. Contact Hisense Roku Support
The last thing on the list is to contact Hisense Roku support team to help you fix the issue.
You can contact Hisense Roku support using their official support line – 1-888-935-8880.
By following all the methods I have shown in this guide, your Hisense Roku TV should now be connecting to WiFi and you shouldn’t have any problem streaming on your TV.
Let me know which of these methods fixed the issue for you in the comment section below.
