Although RCA is not a popular TV brand like Samsung or LG, many people favor it over other brands because it offers durable screens with good picture quality at an affordable price.
However, as with any other TV screen, RCA TVs are prone to issues such as the notorious black screen issue, in which the RCA TV turns on with sound but shows no picture.

Currently, you may be in a state of stress, as this may indicate that your flat-screen television has reached the end of its lifespan and needs to be replaced.
But don’t worry, most of the time you’ll be able to fix this issue and restore your RCA TV’s normal picture by just following these DIY troubleshooting steps below!
So without further delay, let’s get started!
Contents
Why Does My RCA TV Turn On but the Screen is Black?
To help you understand the situation and avoid trying several repairs blindly, let’s first discuss the common causes of this RCA TV black screen issue. They are as follows:
- The power source is insufficient for the TV to turn on fully.
- Temporary bugs or glitches causing the TV to malfunction.
- Loose or faulty connections causing signal interruption between the TV and the video source.
- Incorrect input configuration.
- Outdated or corrupted firmware.
- Hardware failure, including but not limited to the display panel, the backlight, the power board, the mainboard, etc.
- The TV is overheating, causing wires and connections to become loose.
Now, let’s get into the best part…
How to Fix RCA TV Black Screen
Follow this step-by-step troubleshooting guide to fix the RCA TV black screen:
1. Make Sure the Blue Light Is On
Sometimes, the cause of this black screen is not a problem with the picture/display, but rather a problem with the TV not turning on in the first place.
“How would you verify that?”
Simply check the power indicator light on your RCA TV.
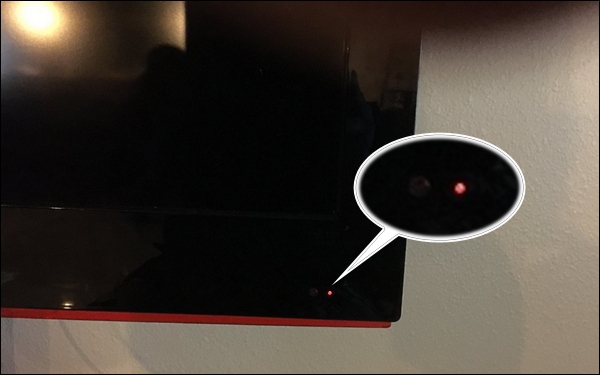
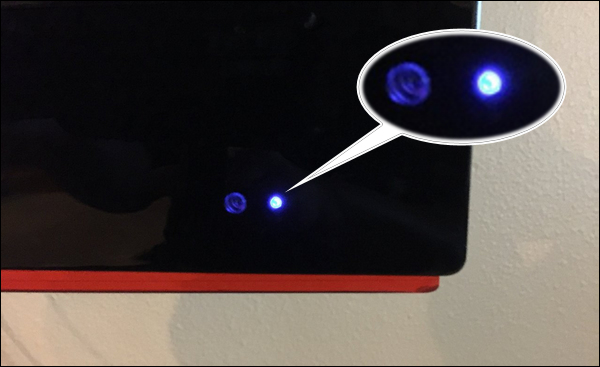
Usually, on a perfect working RCA TV, when you plug the TV to a power source, the power indicator light will turn red, and when you press the power button to turn ON the TV, the light will shift from red to blue.
So…
If the power indicator light on your RCA TV is red, this indicates that the television is not turning on. In this case, you should examine the power supply, the remote control, or the power button.
However, if you see a steady blue light, this indicates that your TV is turned on, but in this particular case it fails to show a picture, so move on to the next step.
2. Power Reset Your RCA TV
In many cases, these picture issues, such as no picture and picture distortion, are caused by temporary software bugs or glitches that can be resolved by performing a power reset or power cycle on your television.
“How to do so?”
Simply…
- Unplug your RCA TV directly from it’s power source.
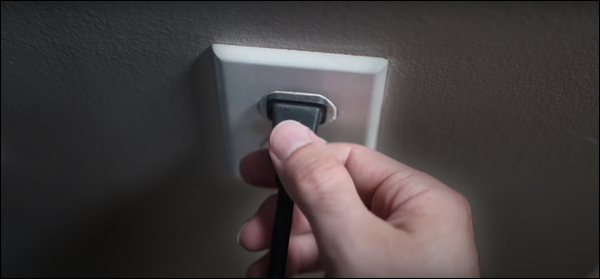
- Wait for at least 10 minutes.
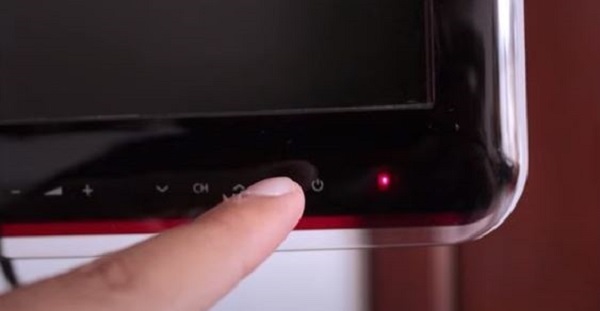
- Then, press and hold the TV’s power button for about 60 seconds to fully discharge it from any residual electricity.
- Plug your TV back in and turn it on.
If performing a power rest on your TV doesn’t restore the picture, move on to the next step!
3. Check the Video Signal
As you already know, for the TV to display a proper picture, the video signal must be transmitted correctly between the video source (such as game consoles, DVD players, and streaming devices) and the TV itself.
But if the video signal is interrupted, there will be no picture or at best a distorted one.
“What could cause a video signal interruption?”
Well, there are two primary causes: problems with the cables and ports responsible for display (typically HDMI ports and cables), and problems with the input or source device.
So, to ensure that a bad video signal is NOT the reason of your RCA TV’s black screen, follow these steps:
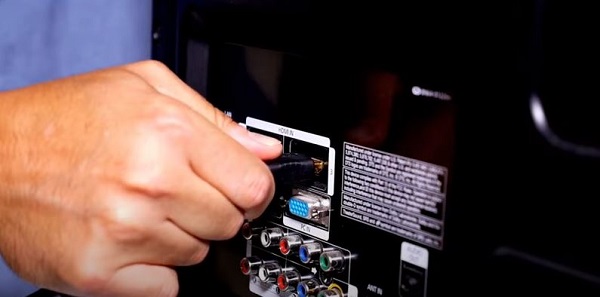
- Whilst the TV is turned on, begin quickly by unplugging and then re-plugging the HDMI or display cable.
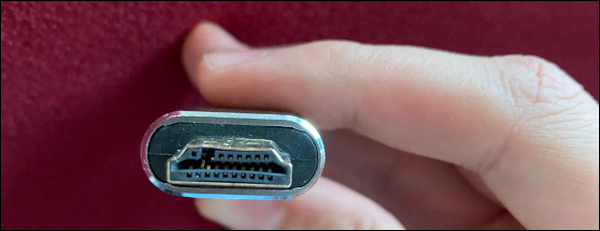
- If that doesn’t work, remove the display cable (HDMI or otherwise) and examine it for wear and tear, such as frayed or twisted wires or bent connectors.
- Whether you observe signs of damage on the HDMI cable or not, it is always recommended to test a different original HDMI cable.
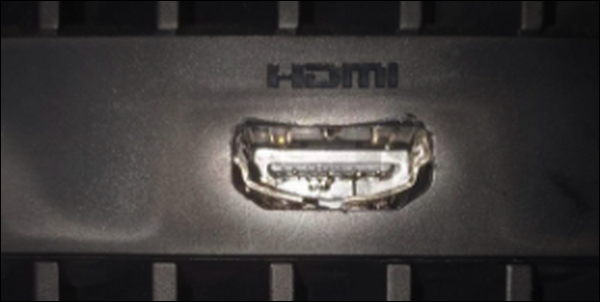
- Next, inspect the HDMI input ports for any hint of physical defects.
- Dust accumulation can also interfere with the video signal, so use compressed air to clean all connectors and ports.
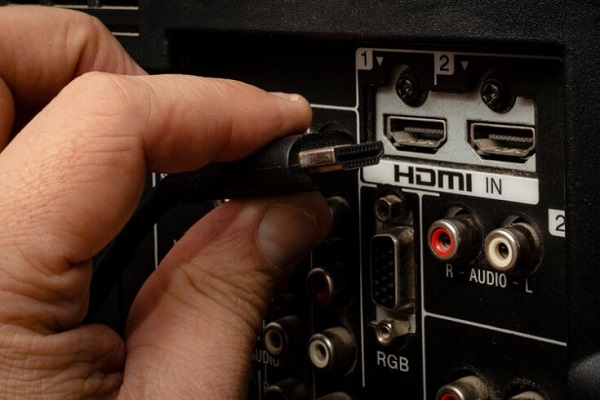
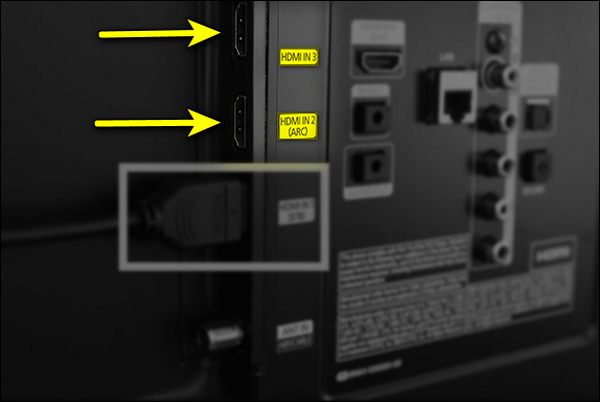
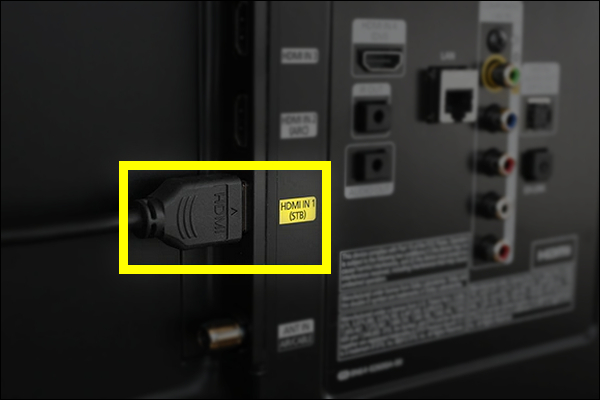
- Assuming that your TV has more than one HDMI port, try plugging the HDMI cable into a different one to rule out the possibility of a bad port.
- As mentioned previously, the input/source device itself may be the cause of this issue and not the TV. Therefore, to ensure that this is not the case, test a variety of input devices with the same RCA television.
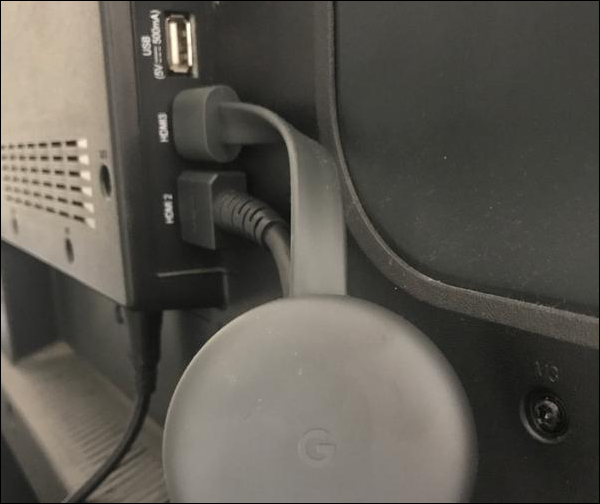
- Finally, when reconnecting any cable, make sure it’s firmly plugged into its ports on both ends with no looseness.
4. Check the Input Source
If you’re experiencing a black screen with no sound, there’s a possibility that this is due to misconfigured Input settings. This means that your RCA TV is working perfectly, but it’s not configured to display the picture from the correct input device.
This can happen for a variety of reasons, including a change in the HDMI port you’re using, therefore, you must configure your TV to display whatever content it receives from that port.
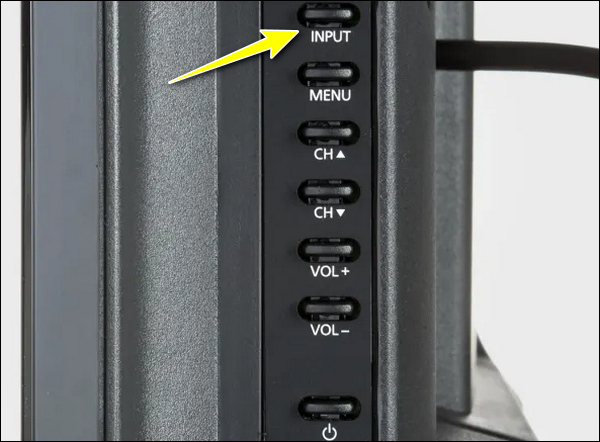
- Just press the Input/Source button on the TV’s back or on the remote control.
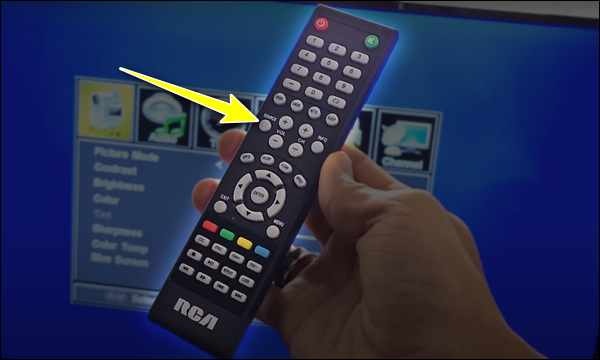
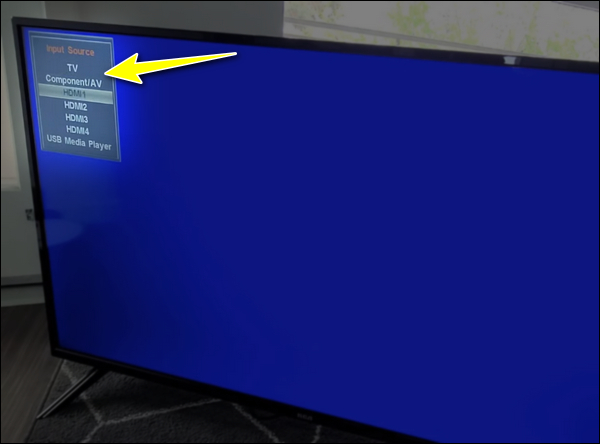
- Next you’ll get on the screen a list of all available input sources, just select the one that matches the input port you’re currently using.
5. Perform a Factory Reset
In these types of situations where a firmware error may be the root cause of the issue, performing a factory reset is necessary to revert the TV’s software to its factory state.
Because you cannot access your TV’s settings menu to start a factory reset, you must use the TV’s physical reset hole or button instead.
- The TV should be turned on.
- Depending on the model of your RCA TV, search for a small hole or button (usually labeled “Reset”) on the back or side panel of the TV.
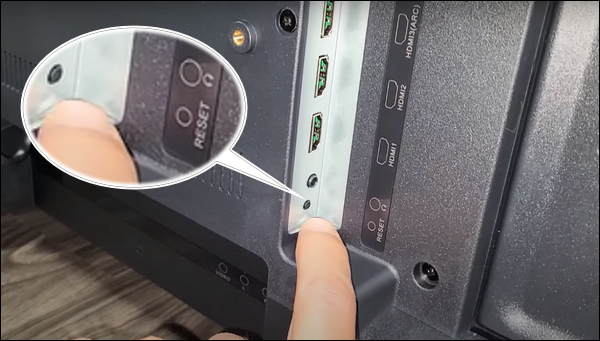
- If your TV has a reset button, press and hold it for approximately 10 to 15 seconds until your TV reboots.
- If your TV has a reset pinhole, insert a paperclip or toothpick into the hole and hold it there for about 10 to 15 seconds until the screen restarts.
- Then, wait for the factory reset process to finish completely.
Now that your RCA TV has been restored to its factory default settings, if the problem was a software error, it should be fixed and the picture should return.
6. Check for Failed Backlight
Just for context, the backlight on your LCD/LED television is what illuminates the image so that it can be displayed clearly.
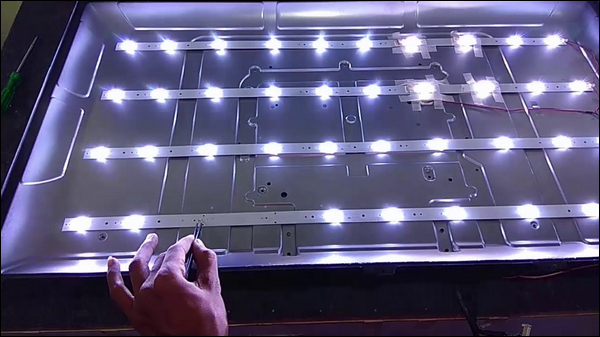
Therefore, if it malfunctions for any reason and stops working, you will be unable to see the picture, even if the other components are functioning properly and displaying it.
Instead, you will see a completely black screen that appears to be off, yet you will still be able to hear audio coming from the TV.
“How can you tell if this is the case?”
Well, just follow these simple steps:
- Make sure your TV is turned on.
- Closely shin a flashlight at the screen.
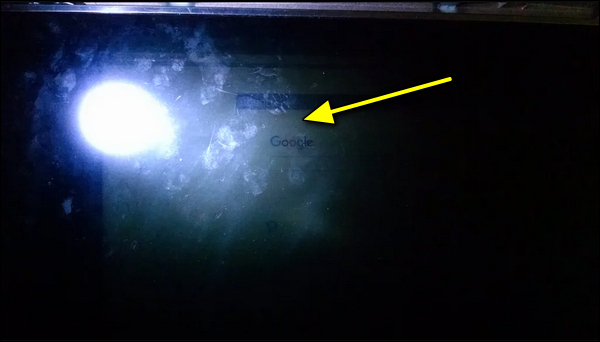
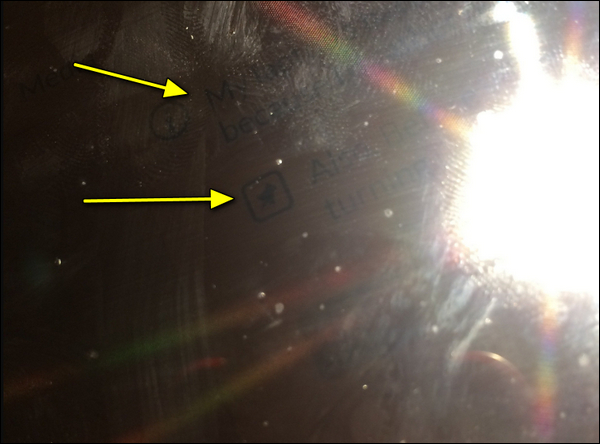
- If you see dim pictures or shadows on the screen, as if your screen’s brightness is set to the lowest setting, this suggests a backlight problem.
- Another indicator of backlight failure is light “bleeding” from the screen’s edges.
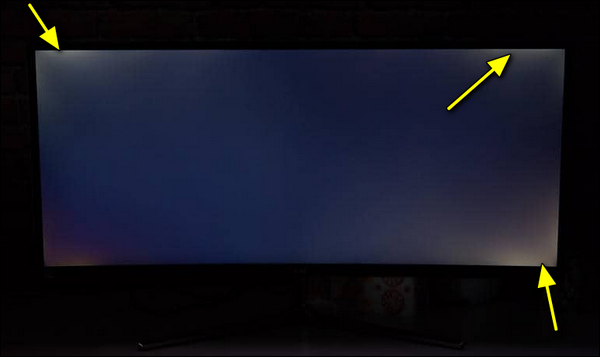
If you confirm a backlight failure, your only possible option is to seek help from a TV repair shop, which would most likely fix the backlight strips by replacing them.
7. Reconnect the T-Con Cables
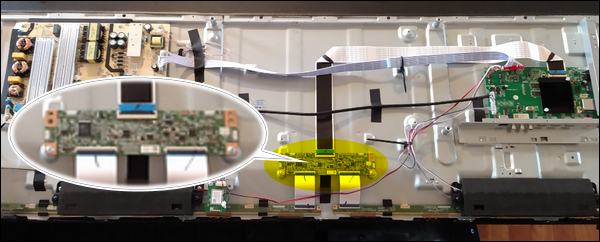
When you experience a full screen failure on your smart TV, one of the important components that should be checked is the T-Con board.
The T-Con board’s job is to receive signals from the TV’s motherboard and then process them for interpretation or display by the TV panel.
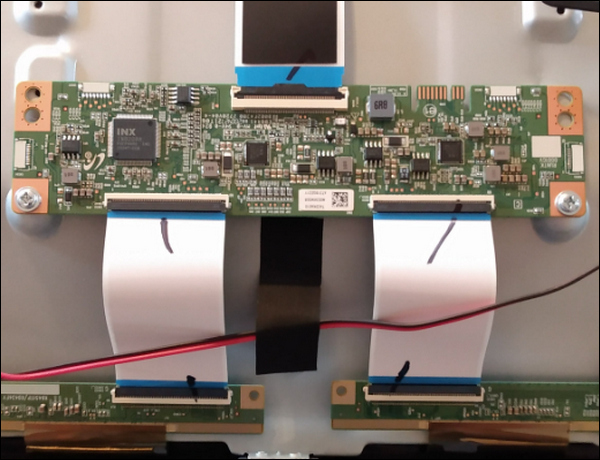
As with any other component, failure of the T-Con board or its connections can result in a completely black screen. Therefore, they must be checked.
Checking the T-Con board for failure requires technical expertise, so you cannot perform the test on your own.
However, it’s possible for you to examine its connections or cable if you follow the steps below:
- Turn off your TV and unplug it from the power source.

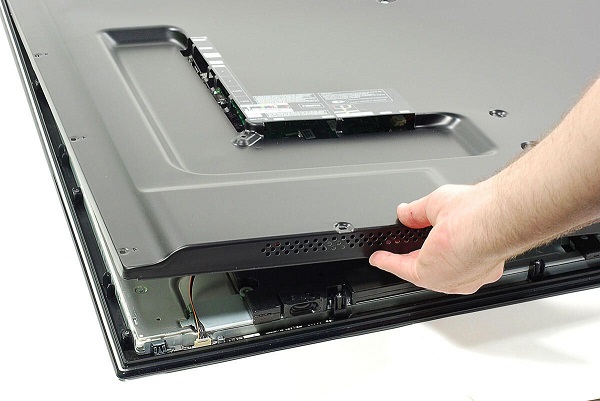
- Remove the TV’s back panel to access the T-Con board.
- Locate the T-Con board, which can be identified by its ribbon cables.
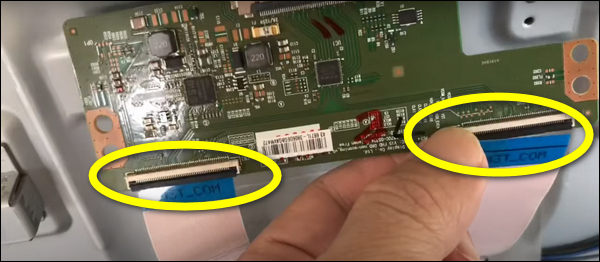
- Carefully disconnect the T-Con ribbon cables from their respective connectors.
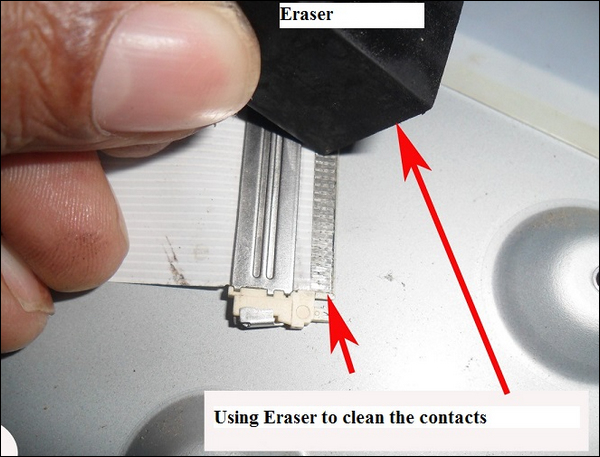
- Using a pencil eraser, clean the contacts on the ribbon cable.
- Reinstall the T-Con cables back.
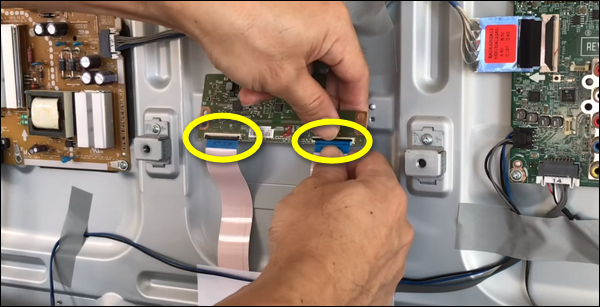
- Put back The TV’s back panel.
- Reconnect and power on your TV and check if its picture is back.
If the black screen issue has been fixed, congratulations.
However, if the problem persists, it’s possible that the T-Con board itself is defective.
8. Contact a TV Technician
Well, there is a limit to what you can do on your own in this situation, especially if you suspect that your TV has a hardware problem, such as a faulty T-Con board, main board, or LCD panel.
Therefore, if you have reached this point without success, it is time to contact a local TV technician or TV repair service for diagnosis and repair.
Conclusion
Although seeing a black screen on your TV can be worrying since you might assume that it is beyond repair and needs to be replaced, this is often not the case.
Your TV may be experiencing basic issues, such as temporary bugs or glitches, which you can fix yourself by applying the solutions outlined above.
Lastly, if you have exhausted all available options, there are always people with more experience and diagnostics tools than you, so don’t be hesitant to reach out to them.
