I understand how frustrating and how much of an headache it can be when you have an Hisense TV that won’t turn on and flashes red light 6 times.

In some cases, the red LED light flashes as if the TV wants to turn on only for it to turn to a solid red light again (remain in standby mode). In other cases, the TV turns off completely after flashing red light 6 times.
In this troubleshooting guide, I will explain to you what is causing this to happen on your Hisense TV (and what to not bother checking). More importantly, I will show you a step-by-step process to help you fix it.
If that sounds good to you, let’s dive right in!
Hisense TV Won’t Turn On Red Light Flashes 6 Times
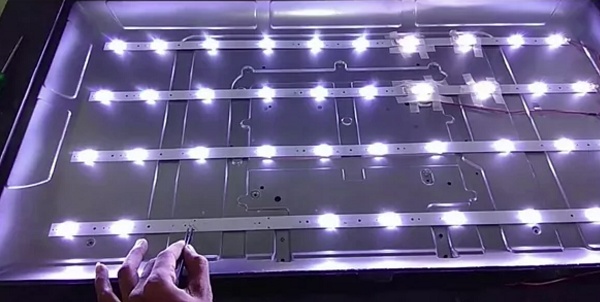
If your Hisense TV won’t turn on and red light flashes 6 times, you most likely have a busted bulb. In other words, one or more of the LEDs on the light strips behind the panel are burned out.
Hisense TVs have a shutdown mechanism that is sensitive enough to detect even when just one bad LED on the strips of the TV. This system prevents the TV from turning on, and continues to blink red light 6 times in accordance with the Hisense blinking codes.
That has been the most common cause of this particular issue.
You can go ahead and try replacing the main board or power board, but I assure you that it will most likely not fix this issue. In fact, I have seen many who did, to no avail.
In some cases however, this issue can also be caused simply by a minor software glitch/bug or bad capacitors.
Since both of those are relatively easier to fix, I will first show you what you need to do to fix the software glitch or check (and if necessary replace) bad capacitors on the board.
If the issue persists after that, then the LED strip is the way to go. I will also show you step-by-step how to do that by yourself (with videos).
So, let’s begin.
1. Power Cycle the TV
The first thing you need to do when you Hisense TV won’t turn on and flashes red light 6 times is to power cycle it.
This is also called a soft reset, and fixes minor software glitches or bugs that are sometimes responsible for the issue.
It is a very simply, yet effective fix for this particular issue and many other similar Hisense issues.
Here’s how to power cycle the TV:
- While your Hisense TV is flashing red light, unplug the power cable directly from the power outlet
- Leave it unplugged for 60 seconds
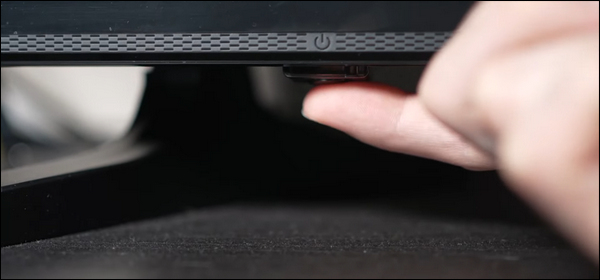
- While unplugged, press and hold the power button on the TV for 30 seconds

- Plug the TV back into the power source
#
- Turn it on using the remote controller or the power button on the TV.
Now, your TV should turn on and the red light should stop flashing 6 times.
You should know that the situation is a bit different if your Hisense TV screen is black but you can hear sound coming from the TV.
2. Check for and Replace Fault Capacitors
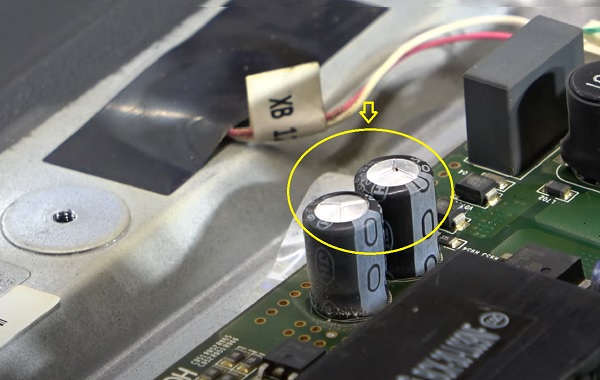
Another reason why Hisense TV won’t turn on and flashes red light is having faulty capacitors on the TV panel, usually on the main board.
What you simply need to do is replace the faulty any capacitor with another one that has same rating, and the TV will come on.
NOTE: Before you start, make sure you unplug your TV and leave it unplugged for 30 seconds. Also, press the power button on the TV for 30 seconds. This will help discharge the capacitors before you open up the TV panel.
Now, here’s a step-by-step process of what you need to do: (I have also added a video at the end for visual demonstration of the whole process)
- Remove the screws and open the back cover of the TV.
- Next, unplug all the cables going into the main board like the speaker cable, Wi-Fi module cable etc.
- Then, do a quick visual inspection to see if there is any faulty capacitor. It’s quite easy to see this.
If a capacitor is faulty, some of the signs you might see include:
- The capacitor is bulging at the top
- The capacitor is leaking
- Corrosive layer on one or both legs of the capacitor

NOTE: The capacitor may be faulty and not show any visual sign. Hence, the most accurate way to check in such case will be to use a multimeter to check the voltage, and compare it to the expected/labelled voltage of the capacitors. If you see a wrong voltage reading on the multimeter, then it is faulty even if there is no visual sign.
Now, here’s how to remove the faulty capacitor(s):
- Carefully take note of the pin on the board that the capacitor is attached. You should do the removal with a soldering iron (do not force pull it out)
- With the heated soldering iron, carefully apply pressure from the back of the board on the pin for the faulty capacitor until it melts.
- Then, you can go ahead and remove it.
While replacing the capacitor, you should know the following:
- The new capacitor must be placed in exactly the same orientation as the old damaged one
- Ideally, you should replace the capacitor with a new one that matches the ratings (Voltage, Temperature and Micro farads). In case where you can’t get the exact value for the 3 ratings, you can get one that has voltage and temperature that is higher that that of the old capacitor but not lower. The micro farad can also be slightly higher, but not lower.
Once you have gotten the new capacitors, replace the old faulty one you removed using a soldering iron.
Remember: The capacitor needs to be placed exactly how the old one was placed.
- Once replaced, plug back all the cables you had disconnected from main board and assemble the TV back
- Now, plug in the TV, turn it on and the TV should fire up right away. The Hisense TV should now turn on.
If you can’t do this on your own, you can get it repaired. Depending on your location, it should cost between $100 – $200.
That said, here’s the video for the visual demonstration of the whole process:
If that fixes the issue for you, great!
- Hisense TV Blinking 2 Times (Here’s What It Means!)
- Hisense TV Blinking 3 Times (Here’s What It Means!)
Otherwise, you most likely have one or more burned out LEDs on the backlight strips.
3. Replace Bad LEDs or LED Strip
I mentioned earlier already that this is the most common reason behind Hisense TV flashing red light 6 times and not turning on, due to the shutdown mechanism on the TV.
All you need to do is access the panels carefully without damaging it, then replace the bad bulbs. You can also change all the strips as a whole which is relatively easier than replacing individual ones.
If you choose to replace only the bad LEDs, you should remember that LEDs are polarity sensitive i.e if the LED fails to turn on, you might need to switch the negative and positive leads.
Either ways, you will need a LED tester to locate the bad LEDs and replace it with a new LED segment.

I have attached two videos showing the troubleshooting process:
- In the first one, only the bad LEDs are replaced
- In the second video, all the LED strips are replaced
Whichever one you find easier, as long as it’s done right, your Hisense TV will be fixed.
Here’s the first video:
Here’s another video showing how to replace all the fault LED strips:
4. Contact Hisense Support
If your Hisense TV won’t turn on, flashes red light 6 times and you don’t want to replace the faulty capacitor or LED strip on your own, then you can contact Hisense support for help.
The official help line is 1-888-935-8880, and you can even get your TV replaced if you are still under warranty.
You may also seek help from a professional to help you with any of the technical procedures discussed in this guide in order to fix the issue.
