Crunchyroll beta is the new redesigned web platform which allows users to stream contents available on their large anime library via web browsers. Since then, a number of users have complained about seeing a black screen on Crunchyroll beta.
Sometimes, the black screen may also come up when the next episode in a series is trying to play.
If you are experiencing the Crunchyroll beta black screen issue on your computer (Windows or Mac) or phone, I am going to show you some and proven ways to fix it in this guide.
Without any further ado, let’s begin right away!
Crunchyroll Beta Black Screen Fix
Below are some quick and proven ways to fix the black screen on Crunchyroll beta:
1. Disable Ad Blocker
Ad blockers are one of the most common reasons why Crunchyroll Beta shows a black screen.
Since the launch of the new interface, there has been reported several cases of users seeing a black screen when trying to stream of just before the next episode come up in a stream.
To fix this, you simply need to disable any ad blocker that you have installed on your browser and you are good to go!
Here’s how to do disable ad blocking extensions on Google Chrome and Safari browser:
On Google Chrome
Click on the menu button (3 dots at the top right corner of your browser)
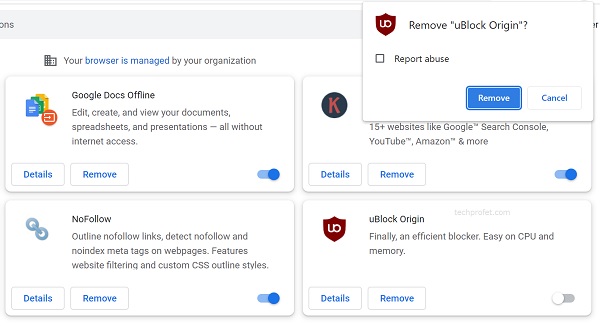
Go to More Tools >> Extensions
If you find any extension suspicious, click on the Remove button.
On Safari Browser
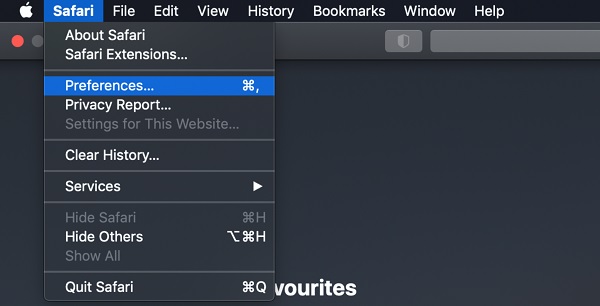
Click on Safari from your top menu bar
Next, click on Preferences…
Switch to the Extensions tab
Once done, go back to Crunchyroll beta and reload the page. Now, try to select an episode to watch and you should no longer see a black screen.
2. Troubleshoot Network Connection
If you don’t have an ad blocker extension installed on your browser and still see a black screen on Crunchyroll beta, then you need to troubleshoot your network connection.
Before you continue checking other potential issues, you need to rule out the possibility of having a slow or unstable internet connection.
In that case, the first thing you need to check is your network router.
Step 1: Power Cycle Your Router
Most times, simply performing a power cycle on your network router will fix connection issues. Here’s how to do that:
Unplug your network router, wait for 10 seconds and plug it back in. Wait a few seconds for the router to become online, connect your streaming device to your router and try to access Crunchyroll beta again.
Step 2: More Network Troubleshooting Step
If power cycling your network router does not fix the issue, try the following:
Reduce activity on your network connection: If there are other devices connected to your network router, these devices may be using up a large amount of the network bandwidth, thereby slowing down your network. Therefore, try disconnecting other devices that are connected to your network and see if that fixes the issue.
Connect to a different network router: If Crunchyroll stops freezing or buffering after switching to a different network connection, then you know for sure that the issue is with your network connection. On the other hand, if nothing changes, then the issue likely has nothing to do with your network connection or (maybe the alternative network connection is also not fast enough).
Try an ethernet cable: Some users have reported that switching to an ethernet cable has fixed the freezing or buffering issue for them. This is not surprising since hardwired connections are generally faster than Wi-Fi connections.
If that doesn’t work, then you probably have an issue with DNS server.
3. Change DNS Server on Your Device
Another quick and proven method of fixing Crunchyroll beta black screen issue is to change your DNS server i.e. point it to a faster DNS server.
The best ones to use are Google DNS servers, Cloudflare DNS server or OpenDNS DNS servers.
Once you switch your DNS server to any of this, you should no longer see a black screen or experience other streaming issues like buffering, stuttering etc.
You can do this on your Windows or Mac computer, phone or even directly from your router’s dashboard (as seen below):
Changing DNS Server on Windows PC:
If you are trying to access HBO Max using Chrome browser or the app on your Windows PC and it’s not loading/working, then you can also fix it by changing the primary DNS server to 8.8.8.8 and secondary DNS server to 8.8.4.4 on your Windows PC.
Here’s how to do that:
Go to Control Panel > View network status and task
Click on the connected network
Select ‘Properties’
Double click on ‘Internet Protocol Version 4 (TCP/IPv4)’
Now, tick the box that shows ‘use the following DNS server addresses’. Next, enter 8.8.8.8 under ‘Preferred DNS server’, and 8.8.4.4 under ‘Alternative DNS server’
Click on ‘OK’ to save it.
Alternatively, you may use Cloudflare’s DNS servers (1.1.1.1 and 1.0.0.1) or Open DNS server (208.67.222.222 and 208.67.220.220).
Changing DNS Server on Mac OS:
To change DNS server on your Mac, go to Apple menu > System Preferences
Click on Network
Select the network service you are connected to in the list, then click on ‘Advanced’
Switch to the DNS tab.
If there’s a lock at the bottom left of the Network pane, click it to unlock the preference pane.
Click the Add button at the bottom of the DNS servers list. Enter 8.8.8.8 on the first line and 8.8.4.4 on the second line.
Click on ‘OK’ button, then ‘Apply’
You may also change it from your router’s dashboard and the new DNS server will be applied to all devices that are connected to the router.
Changing DNS Server on Router:
While connected to your network router, access your router dashboard by visiting the login URL. You can find this on the router manual or on your router. Some of the links can be found below:
Linksys – http://192.168.1.1
D-Link/Netgear – http://192.168.0.1
Belkin – http://192.168.2.1
ASUS – http://192.168.1.1/
AT&T U-verse – http://192.168.1.254
Comcast – http://10.0.0.1
Depending on the manufacturer of the router, look for DNS settings on the web interface. If you are having trouble finding the DNS server settings, check the router’s manual or search on Google for how to change DNS server for your router’s brand.
Under DNS server 1 (or primary DNS), input 8.8.8.8
Under DNS server 2 (or secondary DNS), input 8.8.4.4
If there are options to input DNS server 3 and 4, leave them empty
Once the DNS has been changed, restart your device so that it reconnects to the new DNS server. Then, open Crunchyroll beta again and you should no longer see a black screen.
Browsers like Chrome and Firefox block pop-ups on most websites by default unless you allow such pop-ups of specific websites.
By blocking pop-ups on Crunchyroll beta which is used in the player, this can interfere with streaming and so you may see a black screen.
To fix this, you simply need to enabled pop-up for Crunchyroll beta.
Here’s how to do that:
Launch Chrome and click on the three dots in the upper right corner.
Click on ‘Privacy and security’, then click on ‘Site settings’
Scroll down and select ‘Pop-ups and redirects’ under content section
In front of ‘Allowed to send pop-ups, click on ‘Add’ button
Enter https://crunchyroll.com in the box and click ‘Add’
Once done, go back to Crunchyroll beta page, reload it and you should now be able to stream without seeing a black screen.
5. Allow Autoplay (for Firefox Browser Users)
For Firefox browser users, you need to check the autoplay settings on your browser and ensure that audio and/or video autoplay have not been blocked (which may cause video to freeze or show a black screen).
Here’s how to check it:
Click the menu button on your browser (3 horizontal dashes), and select Settings.
Select Privacy & Security, and go down to the Permissions section (you may also enter autoplay in the ‘Find in settings’ search box)
Click on the settings button next to ‘Autoplay’
Using the ‘Default for all websites’ drop-down menu, select Allow Audio & Video
However, site-specific settings may still override this general autoplay settings.
Therefore, if Crunchyroll is listed on the list of site-specific autoplay settings, make sure that the option next to it is set to ‘Allow audio and video’. Otherwise, allowing it on all websites is enough to do the job.
Once done, go back to Crunchyroll beta, reload the page and you should now be able to stream without any issue with black screen.
6. Try Watching in Incognito Mode
One quick way to know if the black screen on Crunchyroll beta is caused by your browser is to try streaming in incognito mode.
In incognito mode, so many features (like browser extensions) which may disrupt the stream are disabled.
Also, cache files which have been stored in the browser are not used in incognito mode. Instead, the website resources will be freshly requested for directly from the server.
Therefore, if you are able to stream seamlessly without a black screen coming up on Crunchyroll beta, then you most likely have an issue with the browser extensions or cache files in the browser.
To open your browser in incognito mode, press CTRL + Shift + N on Windows or Command + Shift + N on Mac PCs.
7. Clear Browser Cache & Cookies
Cache files stored in the browser may interrupt with the stream, causing it to show a black screen. To fix it, you simply need to clear the saved browser cache files and cookies.
Here’s how to do that:
On Google Chrome Browser
Chrome browsers include Chrome, Firefox, Opera mini, Brave etc. Here’s how to clear your cache and cookies:
Go to Settings > History, or press CTRL + H on your Windows keyboard (CMD + H on MacOS)
Click on ‘Clear browser data’
Once cleared, login back to your Crunchyroll beta account and see if the black screen has been fixed.
On Safari Browser
Follow the procedures below clear your history and cache on Safari browser:
Click on Safari > Clear History…
Select a range (preferably All history)
Click on Clear history
Once done, Crunchyroll beta should stop showing a black screen if the issue is coming from corrupt cache files. Otherwise, move on to the next step.
8. Disable Suspicious Browser Extensions
Other than ad blockers (which by now should have been disabled), you may have other extensions causing CR beta to show a black screen.
Therefore, you need to check other extensions on your browser that may be interrupting with the stream.
9. Update Your Browser
If you have a version of web browser that is not supported, you may see a black screen on Crunchyroll beta. Therefore, you need to make sure you have a recent version.
Below are the minimum browser versions currently supported by Crunchyroll beta:
Browser
Supported versions
Google Chrome
70+
Mozilla Firefox
70+
Safari
12+
Opera
64+
Edge
15+
You can check if your Chrome browser is up-to-date by clicking on the 3 vertical dots at top right corner > Help > About Chrome.
You can do the same for other browsers as well.
10. Use a Different Browser
Another thing you can do is to simply switch to a different browser and see if the black screen issue also comes up on the new browser or not.
If it doesn’t happen on a different browser, then you know the issue is definitely with your old browser. On the hand hand, if you still see a black screen on Crunchyroll beta on a different browser, then you know it has to be caused by something else.
11. Check If Other Videos Work
The last thing you can check is if other videos work, or if it’s an issue with a particular video.
If it only happens on one video or a few videos (but not all), then you need to contact Crunchyroll and report the issue.
The support team will help to check the encoding of the video and other things that might be responsible for the black screen.
Also, check if Crunchyroll streaming server is experiencing a downtime. You can use this tool to check.
The new Crunchyroll beta offers an improved designed to the classic platform, with improved mobile experience, new search capabilities and also brings the Crunchylists feature which allowed users to create a curated collections of their own.
However, there has been many cases of users complaining about Crunchyroll beta showing a black screen when trying to stream. The black screen may also show when the next episode is a show is about to come up.
By following the methods discussed in this guide, you should be able to fix Crunchyroll beta black screen issue and enjoy a seamless streaming experience.
Let me know which methods helped you fix the issue in the comment section below.